Controller Activators: These special codes allow you to activate certain codes at certain times, and are invaluable when it comes to the Beta Quest. To set values use the following chart. Then enter in the code you wish to activate under the activator code on Gameshark. While playing your game, press that button and the code you entered in will activate. For instance:
| D01C84B5 0020 811DAA90 40CB |
Moon Jump |
Since the 20 on the activator mean the L button, pressing L will activate the code underneath (811DAA90 40CB).
ACTIVATOR 1
|
|
|
|
|
|
|
|
|
|
|
|
|
|
|
|
|
|
|
|
|
|
|
|
|
|
|
|
|
|
|
|
|
ACTIVATOR 2
|
|
|
|
|
|
|
|
|
|
|
|
|
|
|
|
|
|
|
|
|
|
|
|
|
|
|
Max Skulltulas: This code is set so you have 255 Golden Skulltulas. However, if you attempt to enter the Skulltula House, the game will freeze. To make it work, change the last two digits (FF) to 64. This will give you 100 Golden Skulltulas, and the game won't freeze.
All Quest / Status Items: This code can really mess up the game badly, so do not use it on any important files. Though you will have all the warp songs, medallions, and such, the game will still think you haven't learned them yet, so the first time you warp you will have to go through the cutscene where you learn the song (except for Lake Hylia and Graveyard). DO NOT USE IT TO CHEAT AND BEAT ZELDA. The code can cause very strange things to happen, and could be potentially dangerous.
Levitation (a.k.a. Moon Jump): Press L at any time while playing and Link will rise in the air. You can go through some roofs, you can't go through others, but this code is extremely useful. Don't use it to cheat and beat the game! It is best used to find/see glitches and for the Beta Quest.
Giant's Knife Becomes Biggoron Sword: You have to have the Giant's Knife in order for this code to work.
Unlimited Rupees: Replace the ? marks with a hexadecimal
number, ranging from 0 to 3E7. If you don't have a scientific calculator
or something that can convert decimal numbers to hexadecimal numbers, I suggest
you use Calculator and switch to Scientific. Make sure the top-left
box is set to Dec and enter in how many rupees you want. Then
click on Hex. Copy the number down and plug it into the code. Here are some common values already converted to Hex:
0 Rupees = 000
99 Rupees = 063
200 Rupees = 0C8
500 Rupees = 1F4
999 Rupees = 3E7
Warning: Although you can set the value above 3E7, this can make the
game unstable since it cannot display numbers over 999 in the rupee
counter. There is literally no need to use any number over 3E7,
and for maximum compatibility, we would recommend not setting it any
higher than the maximum number of rupees you can currently hold.
That way, the moment you spend or collect rupees the game won't
automatically force it to 0.
Bottle Modifiers: These codes change the contents of the bottles. If you don't have the bottle you're modifying, the game will give it to you. Replace the ? marks with one of the following:
14 - Empty Bottle
15 - Red Potion (Raises HP to full)
16 - Green Potion (Raises MP to full)
17 - Blue Potion (Raises HP and MP to full)
18 - Bottled Fairy (Raises HP to full, restores your health to full
if you die)
19 - Fish (Jabu-Jabu and the Beggar)
1A - Lon Lon Milk (Raises HP a little bit, then becomes Half Lon Lon
Milk)
1B - Letter (Give to King Zora to reach Jabu Jabu)
1C - Blue Fire (Melts red ice and reddish ice walls)
1D - Bug (Use at soft spot to get Gold Skulltula, give to Beggar for
money)
1E - Big Poe (Sell to Poe Shop for money)
1F - Half Lon Lon Milk (Raises HP a little bit, then empty)
20 - Poe (Sell to Poe Shop for money, gulp it down to lose HP)
|
|
|
|
|
|
|
|
|
|
|
|
|
|
|
|
|
|
|
|
|
|
|
|
|
|
|
|
|
|
|
|
|
|
|
|
|
|
|
|
|
|
|
|
|
|
|
|
|
|
|
|
|
|
|
|
|
|
|
|
|
|
|
|
|
|
|
|
|
|
|
|
|
|
|
|
|
|
|
|
|
|
|
|
|
|
|
|
|
|
|
|
|
|
|
|
|
|
|
|
|
|
|
|
|
|
|
|
|
|
|
|
|
|
|
|
|
|
|
|
|
|
|
|
|
|
|
|
|
|
|
|
|
|
|
|
|
|
|
|
|
|
|
|
|
|
|
|
|
|
|
|
|
|
|
|
|
|
|
|
|
|
|
|
|
|
|
|
|
|
|
|
|
|
|
|
|
|
|
|
|
|
|
|
|
|
|
|
|
|
|
|
|
|
|
|
|
|
|
|
|
|
|
|
|
|
|
|
|
|
|
|
|
|
|
|
|
|
|
|
|
|
|
|
|
|
|
|
|
|
|
|
|
|
|
|
|
|
|
|
|
|
|
|
|
|
|
|
|
|
|
|
|
|
|
|
|
|
|
|
|
|
|
|
|
|
|
|
|
|
|
|
|
|
|
|
|
|
|
|
|
|
|
|
|
|
|
|
JAP TEXT: Wind Medallion |
|
|
|
|
JAP TEXT: Flame Medallion |
|
|
|
|
JAP TEXT: Ice Medallion |
|
|
|
|
|
|
|
|
|
|
|
|
|
|
|
|
|
|
|
|
|
|
|
|
|
|
|
|
|
|
|
|
|
|
|
|
|
|
|
|
|
|
|
|
|
|
|
|
|
|
|
|
|
|
|
|
|
|
|
|
|
|
|
|
|
|
|
|
|
|
|
|
|
|
|
|
|
|
|
|
|
|
|
|
|
|
|
|
|
|
|
|
|
|
|
|
|
|
|
|
|
|
|
|
|
|
|
|
|
|
|
|
|
|
|
|
|
|
|
|
|
|
|
|
|
|
|
|
|
|
|
|
|
|
|
|
|
|
|
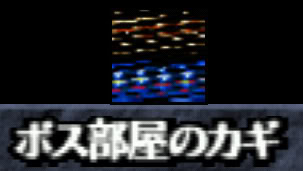
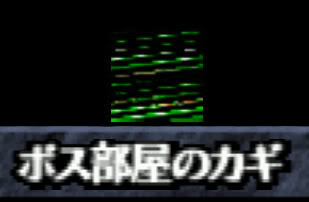
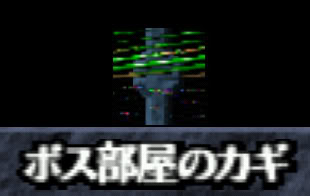
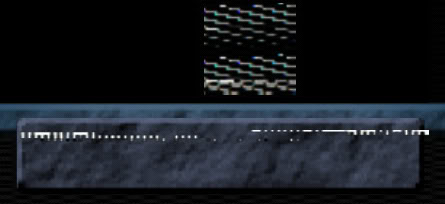
JAP TEXT: Dungeon Boss's Key |
|
|
|
|
JAP TEXT: Dungeon Boss's Key |
|
|
|
|
JAP TEXT: Dungeon Boss's Key |
|
|
|
|
JAP TEXT: Dungeon Boss's Key |
|
|
|
|
|
|
|
|
|
|
|
|
|
|
|
|
|
|
|
|
|
|
|
|
|
|
|
|
|
|
|
|
|
|
|
|
|
|
|
|
|
|
|
|
|
|
|
|
|
|
|
|
|
|
|
|
|
|
|
|
|
|
|
|
|
|
|
|
|
|
|
|
|
|
|
|
|
|
|
|
|
|
|
|
|
|
|
|
|
|
|
|
|
|
|
|
|
|
|
|
|
|
|
|
|
|
|
|
|
|
|
|
|
|
|
|
|
|
|
|
|
|
|
|
|
|
|
|
|
Dungeon Boss's Key? |
|
|
|
|
|
|
|
|
|
|
|
|
|
|
|
|
|
|
|
Dungeon Boss's Key
|
|
|
|
|
Dungeon Boss's Key
|
|
|
|
|
Dungeon Boss's Key
|
|
|
|
|
|
|
|
|
|
|
|
|
|
|
|
|
|
|
|
|
|
|
|
|
ENG: Gerudo's Fortress |
|
|
|
|
ENG: Gerudo's Valley |
|
|
|
|
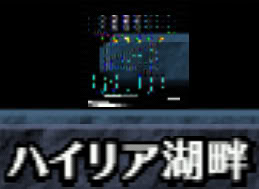
ENG: Lake Hylia |
|
|
|
|
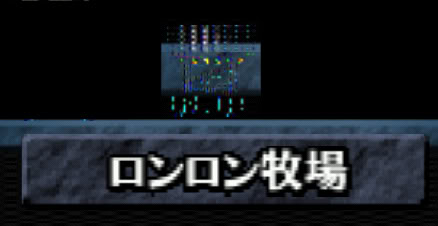
ENG: Lon Lon Ranch |
|
|
|
|
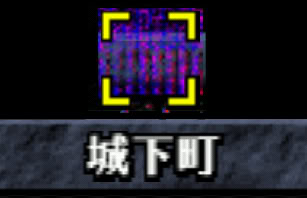
ENG: Town From Castle |
|
|
|
|
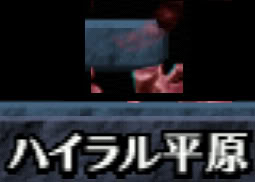
ENG: Hyrule Field |
|
|
|
|
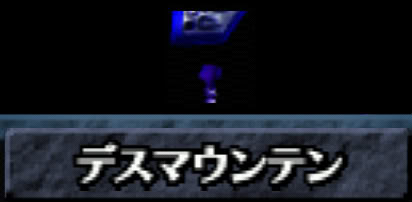
ENG: Death Mountain |
|
|
|
|
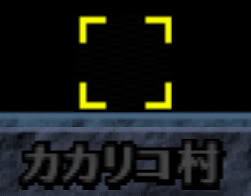
ENG: Kakariko Village |
|
|
|
|
|
|
|
|
|
|
|
|
|
|
|
|
|
|

|
|
|
|
|
|
|
|
|
|
|
|
|
|
|
|
|
|
|
|
|
|
|
|
|
|
|
|
|
|
|
|
|
|
|

|
|
|
|
|
|
|
|
|
|
|
|
|
|
|
|
|
|
|
|
|
|
|
|
|
|
|
|
|
|
|
|
|
|
|
|
|
|
|
|
|
|
|
|
|
|
|
|
|
|
|
|
|
|
|
|
|
|
|
|
|
|
|
|
|
|
|
|
|
|
|
|
|
|
|
|
|
|
Clothing: This allows you to change Link's tunic and boots, child or adult! Simply replace the ?? marks with the numbers you desire below:
| BOOTS |
TUNICS |
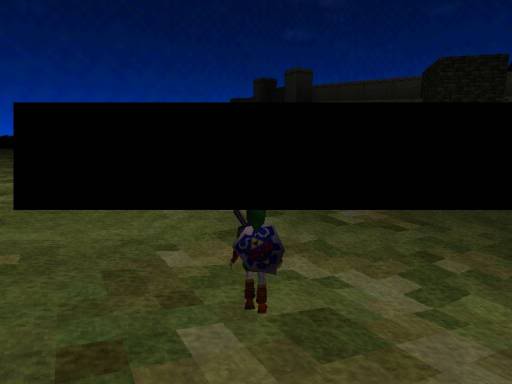
| 0 - May crash; Link has
trouble falling, cannot walk/run 1 - Kokiri Boots 2 - Iron Boots 3 - Hover Boots 4 - May crash; Link can't run 5 - May crash; acts like Kokiri Boots 6 - May crash; Link can't move 7 - Crashes 8 - May crash; Anti-Gravity Boots 9 - Super Anti-Gravity Boots and Blackout (see below) A - *same* B - Crashes (see below) C - Super Anti-Gravity Boots and Blackout D - Crashes E - Same as C F - Crashes |
0 - Dark Green Tunic 1 - Kokiri Tunic 2 - Goron Tunic 3 - Zora Tunic 4 - Black Tunic 5 - White Tunic 6 - Gold Tunic 7 - Black Tunic 8 - Kokiri/Green Tunic 9 - Dark Blue Tunic A - Dark Red Tunic B - Lime Tunic C - Light Blue Tunic D - Black Tunic E - Black Tunic F - Black Tunic |
Odd Li'l Crash (0B) - When this value is used, the
game will briefly show a black rectangle over the screen, then normal, then
black out entirely. Very unusual. Please note that due to problems
with the emulator, the screenshot was taken with RGB emulation, so the ground
textures haven't mixed properly.
Equipment Modifier 1: This allows you to change your equipment. Just replace the ?? marks with the equipment number you desire below (please note that this is an incomplete list):
02 - Silver Scale
04 - Golden Scale
06 - Broken Giant's Knife
40 - Bullet Bag (Holds 30 Seeds)
80 - Bullet Bag (Holds 40 Seeds)
C0 - Bullet Bag (Holds 50 Seeds)
Equipment Modifier 2: This allows you to change your equipment. Just replace the ?? marks with the equipment number(s) you desire below (please note that this is an incomplete list):
08 - Bomb Bag (Holds 20 Bombs)
10 - Bomb Bag (Holds 30 Bombs)
18 - Bomb Bag (Holds 40 Bombs)
20 - Goron's Bracelet
28 - Silver Gauntlets
30 - Silver Scale
Equipped Stuff Modifier: This is the same code as the clothing code. See above.
Time of Day Modifier: Allows you to change the time of day. This can be particularly useful, but remember that it is in hexadecimal , not hhmm format!
4000 - Sunrise
5800 - Daylight
7000 - Noon
C000 - Sunset
D000 - Dark
FFFF - Midnight
Starting Point Modifier: This changes where Link starts when you load a file or die and choose to continue. Please note that the list below is incomplete, and that there are more starting points than this.
01 - Dodongo's Cavern (Adult Link Only)
02 - Inside Jabu-Jabu
06 - Spirit Temple (Child Link Only)
07 - Shadow Temple (Adult Link Only)
09 - Ice Cavern (Adult Link Only)
0A - Ganon's Castle
0C - Thieves Hideout (Child Link Only)
0E - Ganon's Castle
0F - Ganon's Castle
Shield / Sword Modifier: This changes Link's equipped
shield and sword. Please note that sometimes when you change the sword,
the game will not change the B button appropriately. In order to have
the game set it correctly, either select the appropriate sword, or use the
B Button Modifier code. Sorry, there's no way around it.
11 - Deku Shield + Kokiri Sword
12 - Deku Shield + Master Sword
13 - Deku Shield + Giant's Knife or Biggoron's Sword
21 - Hylian Shield + Kokiri Sword
22 - Hylian Shield + Master Sword
23 - Hylian Shield + Giant's Knife or Biggoron's Sword
31 - Mirror Shield + Kokiri Sword
32 - Mirror Shield + Master Sword
33 - Mirror Shield + Giant's Knife or Biggoron's Sword
Shields on C-Right: This code can erase saved game files. Use this code if you do not have any important files on your cartridge, or if you're using the ROM.
Cutscene Maker: This code can allow you to create
or run cutscenes. To "create" your own cutscene, start up a file
and play a warp song. Select "Yes" and right before Link appears
from the glitter, press and hold the R button. Link will be able to
run around as usual, but the camera will still be in cinema mode.
To run a cutscene, start up in the Beta Quest. Select the
appropriate Quest (between 0 - 9) and use the Quest Map to find your cutscene.
Once you are there make sure Link is on a stable surface (won't fall) and
then press R. The cutscene will then begin. Once the cutscene
ends you may be warped to a different area, or you may end up back where
you were before you started the cutscene.
Weird Item Equipped: As far as I can tell, this is a phony code. I have tried using it several times and it has never worked. If anyone knows how to work this code, please let me know.
Have Black Gauntlets, Silver Scale, Unlimited Rupees: This is one of the most useful codes you will ever find! The Black Gauntlets (won't appear on Equipment Screen) are as strong as the Golden Gauntlets, you can swim deeper than normal, and you'll always have rupees! Very useful for the Beta Quest, working with glitches, or for fun.
Fishing Rod: The fishing rod will cast, but the game will freeze if you try to reel. If you save your game and reset without the code on, there will be a Deku Stick on B instead of a fishing rod. Pressing B without switching to a sword will freeze your game. If your game freezes, it may erase your files. Handle this code with care.
Always Can Use Boomerang: To use the boomerang, press C-Left. It will work as a kid and as an adult (it will be slightly awkward, but it works!).
|
|
|
|
|
|
|
|
|
|
|
|
|
|
|
|
|
|
|
|
|
|
|
|
|
|
|
|
|
|
|
|
|
|
|
|
|
|
|
|
|
|
|
|
|
|
|
|
|
|
|
|
|
|
|
|
|
|
|
|
|
|
|
|
|
|
|
|
|
|
|
|
|
|
|
|
|
|
|
|
|
|
|
|
|
|
|
|
|
|
|
|
|
|
|
|
|
|
|
|
|
|
|
|
|
|
|
|
|
|
|
|
|
|
|
|
|
|
|
|
|
|
|
|
|
|
|
|
|
|
|
|
|
|
|
|
|
|
|
|
|
|
|
|
|
|
|
|
|
|
|
|
|
|
|
|
|
|
|
|
|
|
|
|
|
|
|
|
|
|
|
|
|
|
|
|
|
|
|
|
|
|
|
|
|
|
|
|
|
|
|
|
|
|
|
|
|
|
|
|
|
|
|
|
|
|
|
|
|
|
|
|
|
|
|
|
|
|
|
|
|
|
|
|
|
|
|
|
|
|
|
|
|
|
|
|
|
|
|
|
|
|
|
|
|
|
|
|
|
|
|
|
|
|
|
|
|
|
|
|
|
|
|
|
|
|
|
|
|
|
|
|
|
|
|
|
|
|
|
|
|
|
|
|
|
|
|
|
|
|
|
|
|
|
|
|
|
|
|
|
|
|
|
|
|
|
|
|
|
|
|
|
|
|
|
|
|
|
|
|
|
|
|
|
|
|
|
|
|
|
|
|
|
|
|
|
|
|
|
|
|
|
|
|
|
|
|
|
|
|
|
|
|
|
|
|
|
|
|
|
|
|
|
|
|
|
|
|
|
|
|
|
|
|
|
|
|
|
|
|
|
|
|
|
|
|
|
|
|
|
|
|
|
|
|
|
|
|
|
|
|
|
|
|
|
|
|
|
|
|
|
|
|
|
|
|
|
|
|
|
|
|
|
|
|
|
|
|
|
|
|
|
|
|
|
|
|
|
|
|
|
|
|
|
|
|
|
|
|
|
|
|
|
|
|
|
|
|
|
|
|
|
|
|
|
|
|
|
|
|
|
|
|
|
|
|
|
|
|
|
|
|
|
|
|
|
|
|
|
|
|
|
|
|
|
|
|
|
|
|
|
|
|
|
|
|
|
|
|
|
|
|
|
|
|
|
|
|
|
|
|
|
|
|
|
|
|
|
|
|
|
|
|
|
|
|
|
|
|
|
|
|
|
|
|
|
|
|
|
|
|
|
|
|
|
|
|
|
|
|
|
|
|
|
|
|
|
|
|
|
|
|
|
|
|
|
|
|
|
|
|
|
|
|
|
|
|
|
|
|
|
|
|
|
|
|
|
|
|
|
|
|
|
|
|
|
|
|
|
|
|
|
|
|
|
|
|
|
|
|
|
|
|
|
|
|
|
|
|
|
|
|
|
|
|
|
|
|
|
|
|
|
|
|
|
|
|
|
|
|
|
|
|
|
|
|
|
|
|
|
|
|
|
|
|
|
|
|
|
|
|
|
|
|
|
|
|
|
|
|
|
|
|
|
|
|
|
|
|
|
|
|
|
|
|
|
|
|
|
|
|
|
|
|
|
|
|
|
|
|
|
|
|
|
|
|
|
|
|
|
|
|
|
|
|
|
|
|
|
|
|
|
|
|
|
|
|
|
|
|
|
|
|
|
|
|
|
|
|
|
|
|
|
|
|
|
|
|
|
|
|
|
|
|
|
|
|
|
|
|
|
|
|
|
|
|
|
|
|
|
|
|
|
0-01 - Dodongo's Cavern (Adult Link Only)
0-02 - Inside Jabu-Jabu
0-06 - Spirit Temple (Child Link Only)
0-07 - Shadow Temple (Adult Link Only)
0-09 - Ice Cavern (Adult Link Only)
0-0A - Ganon's Castle
0-0C - Thieves Hideout (Child Link Only)
0-0E - Ganon's Castle
0-0F - Ganon's Castle
1-00 - Inside the Deku Tree
1-03 - Forest Temple
1-04 - Fire Temple
1-05 - Water Temple
1-08 - Bottom of the Well
1-0B - Gerudo Training Grounds
2-0D - Inside Ganon's Castle
2-10 - Temple of Time
3-11 - Inside the Deku Tree
Kill Switch for Floor: You MUST use Levitation/Moon Jump with this code, or else it will not work properly! This code allows you to go above any ceiling or underneath any floor by making the floor passable. In other words, Link will fall through the ground. Use Moon Jump to guide Link safely in the air. Press L to remove the floor. To restore the floor, make sure Link is above the ground and press R. Link will no longer fall through the floor unless you press L again, but Link will not be able to jump. If you fall, Link will land instantly.
Karate Link: Though it doesn't seem like it, Link's sword becomes invisible with this code, making it look like Link is just using his fists. Try charging up with this code, see what happens!
Longshot Becomes Deku Nut Launcher: I've tried this code and it doesn't seem to work. It can also erase files. I do not recommend you to use this code, but you can try.
Archery Game Points: If you want more than 1,500 points, replace 5DC at the end of the code with the number of points you want in hexadecimal format. If you want 2,000 points, replace 5DC with 7D0. DO NOT ENTER IN 2000! If you do, the game will think you want 8,192 points, which would be great except for the fact that it can glitch up the game! If you don't have a scientific calculator or something that can convert decimal numbers to hexadecimal numbers, I suggest you use Calculator and switch to Scientific. Make sure the top-left box is set to Dec and enter in how many rupees you want. Then click on Hex. Copy the number down and plug it into the code.
Market Slingshot Game Points: If you don't want 10 points (maximum is 10), replace A at the end of the code with the number you want ( A is 10 in hexadecimal). DO NOT ENTER IN A NUMBER GREATER THAN A! That can freeze the game or cause the game to get very glitchy. You have been warned!
Medallion Always Selected: A list for this code is being compiled at the moment. Please be patient, it might take a while. You are free to try this code out yourself without a list, but be cautious, a bad number can cause the game to freeze or glitches to occur. However, if you find Japanese text when you use this code, please inform me right away so I can try to translate it!
Item on C-Left, Sometimes Others: Replace the ?? marks with a number from the Item List above. Please note that this code can cause game freezes and sometimes will erase files.
Fish You Catch Weight: Replace the ?? marks at the end of the code with the number of pounds you want the fish to weigh (make sure the number is in hexadecimal!). For instance, 0C would be 13 pounds, FF would be 255 pounds, 00 would be 0 pounds. Don't go higher than 255 or the game may glitch.
Green Gauntlets: Unlike the black gauntlets, the green gauntlets are practically useless and are as strong as the Goron's Bracelet. Use this code only for the color, it won't do much else.
Walk in Cinema Scenes: In order to use the code, you must be in the Beta Quest. Go to an area where Link disappears but the start menu isn't available. Run the cutscene using Cutscene Maker and when it's done playing, it should return and allow you to roam around. This code doesn't always work, and Appear in Strange Places is much more reliable. Some procedures require this code, so it wouldn't be a bad idea to keep this on your Gameshark, but don't have it on unless you really need it.
Japanese Mode: This code will only affect the text, it will not affect gameplay. This code does not give you access to anything that the regular Japanese game has that doesn't appear in the American version, it just changes the font to Japanese. If you create a file, at the point where you enter in your name, you can press R to switch between Katakana, Hiragana, and English characters. If you save your file with Japanese characters, the characters will still appear without the code on, but anyone that tries to say your name will instead say "BBB" or something similar.
Appear in Strange Places: If you are going to use this code, you must have Moon Jump/Levitation on. Every time you go somewhere (whether it's Beta Quest or normal) and press R, you will hear the error noise and Link will appear outside of the room. Use Moon Jump and search for the room, it shouldn't be far away. If you fly long enough while not being inside or over the room, the camera will get stuck and will only point towards Link instead of following him. This code can prevent cutscenes from starting in the Beta Quest, but it does subtract from your health, so use it carefully if you are low on health or if you're a kid.
Beta Quest: The Beta Quest is a debug tool that
was left in by the programmers and designers of the game. It allows
you to walk inside normal places, but the setup of the characters, music,
and signs will be different. This code is the most useful, powerful,
and awesome code in the history of video games due to its capabilities and
strange setup. Nintendo must have really rushed this game if
they accidentally left this in! And if it wasn't an accident, then
god bless the person who left it in!
Side Note: I have a contact in Mad Catz who refers to the Beta
Quest as "The Map Glitch." Now, as I had correctly inferred, every
door, entrance, and exit is assigned a number (only ones that have transitions;
doors in dungeons and certain mini-games don't count). Hence, we have
the Exit Modifier code (which allows us to change the number assigned to
that exit for the duration that the button is held, thereby changing Link's
destination). What the Beta Quest does is stop the game from loading
the map data when the cutscene begins. This means, I believe, that the
data is either random (highly unlikely), or it's preset information stored
within the cutscene initialization data.
|
|
|
|
|
|
|
|
|
|
|
|
|
|
|
|
|
|
|
|
|
|
|
|
|
|
|
|
|
|
|
|
|
|
|
|
|
|
|
|
|
|
|
|
|
|
|
|
|
|
|
|
|
|
|
|
|
|
|
|
|
|
|
|
|
|
|
|
|
|
|
|
|
|
|
|
|
|
|
|
|
|
|
|
|
|
|
|
|
|
|
|
|
|
|
|
|
|
|
|
|
|
|
|
|
|
|
|
|
|
|
|
|
|
|
|
|
|
|
|
|
|
|
|
|
|
|
|
|
|
|
|
|
|
|
|
|
|
|
|
|
|
|
|
|
|
|
|
|
|
|
|
|
|
|
|
|
|
|
|
|
|
|
|
|
|
|
|
|
|
|
|
|
|
|
|
|
|
|
|
|
|
|
|
|
|
|
|
|
|
|
treasure chest containing five rupees |
|
|
treasure chest containing five rupees |
|
|
treasure chest containing five rupees |
|
|
treasure chest containing five rupees |
|
|
|
|
|
|
|
|
|
|
|
|
|
|
|
|
|
|
|
|
|
|
|
|
|
|
|
|
|
|
|
|
|
|
|
|
|
|
|
|
|
|
|
|
|
|
|
|
|
|
|
|
|
|
|
|
|
|
|
|
|
|
|
|
|
|
|
|
|
|
|
|
|
|
|
|
|
|
|
|
|
|
|
|
|
|
|
|
|
|
|
|
|
|
|
|
|
|
|
|
|
|
|
|
|
|
|
|
|
|
|
|
|
|
|
|
|
|
|
|
|
|
|
|
|
|
|
|
|
|
|
|
|
|
|
|
|
|
|
|
|
|
|
|
|
|
|
|
|
|
|
|
|
|
|
|
|
|
|
|
|
|
|
|
|
|
|
|
|
|
|
|
|
|
|
|
|
|
|
|
|
|
|
|
|
|
|
|
|
|
|
|
|
|
|
|
|
|
|
|
|
|
|
|
|
|
|
|
|
|
|
|
|
|
|
|
|
|
|
|
|
|
|
|
|
|
|
|
|
|
|
|
|
|
|
|
|
|
|
|
|
|
|
|
|
|
|
|
|
|
|
|
|
|
|
|
|
|
|
|
|
|
|
|
|
|
|
|
|
|
|
|
|
|
|
|
|
|
|
|
|
|
|
|
|
|
|
|
|
|
|
|
|
|
|
|
|
|
|
|
|
|
|
|
|
Sacred Realm w/ Rain (few seconds) |
|
|
Sacred Realm w/ Rain (few seconds) |
|
|
Sacred Realm w/ Rain (few seconds) |
| 00AB | Back Alley, day. (Enter from Market near bearded
guy's house) |
| 00AC | Back Alley, night (same) |
| 00AD | Back Alley, day (same) |
| 00AE | Back Alley, night (same) |
| 00AF | Kid's Market, day (enter from Market Bridge) |
| 00B0 | Kid's Market, night (enter from Market Bridge) |
| 00B1 | Market Ruins, day? (enter from Market Bridge) |
| 00B2 | Market Ruins, night? (enter from Market Bridge) |
| 00B3 | Kid's Market, day (same entrance, odd transition,
delayed texture loading) |
| 00B4 | Crashes (emulator has difficulties) |
| 00B5 | Bazaar (Child?), day? |
| 00B6 | Bazaar (Child?), night? |
| 00B7 | Bazaar (Adult?), day? |
| 00B8 | Bazaar (Adult?), night? |
| 00B9 | Link's House (next to his bed), day? |
| 00BA | Link's House (next to his bed), night? |
| 00BB | Link's House (next to his bed; Adult?), day? |
| 00BC | Link's House (next to his bed; Adult?), night? |
| 00BD | Link's House (next to his bed; haven't a clue?),
day? |
| 00BE | Crashes (framerate shoots through the roof) |
| 00BF | Kokiri Shop (child?), day? |
| 00C0 | Kokiri Shop (child?), night? |
| 00C1 | Kokiri Shop (adult?), day? |
| 00C2 |
Kokiri Shop (adult?), night? |
| 00C3 |
Dodongo's Cavern (in room before
boss room in front of the switch), day? |
| 00C4 |
Dodongo's Cavern (same), night? |
| 00C5 |
Dodongo's Cavern (same), day? |
| 00C6 |
Dodongo's Cavern (same), night? |
| 00C7 |
Know-It-All Brothers' House, day? |
| 00C8 |
Know-It-All Brothers' House, night? |
| 00C9 |
Know-It-All Brothers' House, day? |
| 00CA |
Know-It-All Brothers' House, night? |
| 00CB |
Hyrule Field (in front of bridge,
white fade-in) |
| 00CC |
Hyrule Field (same, black fade-in) |
| 00CD |
Hyrule Field (same, white fade-in) |
| 00CE |
Hyrule Field (same, black fade-in) |
| 00CF |
Hyrule Field (same, same) |
| 00D0 |
Hyrule Field (same, gradient circle
from center outwards transition) |
| 00D1 |
Hyrule Field (same, same) |
| 00D2 |
Hyrule Field (same, circular gradient
ripple from center outwards transition) |
| 00D3 |
Hyrule Field (same, white fade-in) |
| 00D4 |
Hyrule Field (same, black fade-in) |
| 00D5 |
Hyrule Field (same, circular gradient
ripple from center outwards transition) |
| 00D6 |
Hyrule Field (same, white fade-in) |
| 00D7 |
Hyrule Field (same, white gradient
circle from center outwards transition) |
| 00D8 |
Hyrule Field (same, white fade-in) |
| 00D9 |
Kakariko Village (main entrance,
white fade-in) |
| 00DA |
Kakariko Village (same, black fade-in) |
| 00DB |
Kakariko Village (same, white fade-in) |
| 00DC |
Kakariko Village (same, white fade-in) |
| 00DD |
Kakariko Village (same, black spike
gradient from circle outwards transition) |
| 00DE |
Kakariko Village (same, gradient
circle from center outwards transition) |
| 00DF |
Kakariko Village (same, same) |
| 00E0 |
Kakariko Village (same, same) |
| 00E1 |
Kakariko Village (same, black fade-in) |
| 00E2 |
Graveyard (main entrance, white
fade-out) |
| 00E3 |
Graveyard (same, black fade-in) |
| 00E4 |
Graveyard (same, white fade-out) |
| 00E5 |
Graveyard (same, black fade-in) |
|
|
|
| 00E7 |
Graveyard (same, same) |
| 00E8 |
Zora's River (land entrance) |
| 00E9 |
Zora's River (same) |
| 00EA |
Zora's River (same) |
| 00EB |
Zora's River (same) |
| 00EC |
Kokiri Forest (in front of home
tree, white fade-in) |
| 00ED |
Kokiri Forest (same) |
| 00EE |
Kokiri Forest (same) |
| 00EF |
Kokiri Forest (same, black fade-in) |
| 00F0 |
Kokiri Forest (same, white fade-in) |
| 00F1 |
Kokiri Forest (same) |
| 00F2 |
Kokiri Forest (same) |
| 00F3 |
Kokiri Forest (same, completely
white) |
| 00F4 |
Kokiri Forest (same, white fade-in) |
| 00F5 |
Kokiri Forest (same) |
| 00F6 |
Kokiri Forest (same, black fade-in) |
| 00F7 |
Kokiri Forest (same) |
| 00F8 |
Kokiri Forest (same) |
| 00F9 |
Kokiri Forest (same) |
| 00FA |
Sacred Forest Meadow (main entrance) |
| 00FB |
Sacred Forest Meadow (same) |
| 00FC |
Sacred Forest Meadow (same) |
| 00FD |
Sacred Forest Meadow (same) |
| 00FE |
Sacred Forest Meadow (same, white
fade-in) |
| 00FF |
Sacred Forest Meadow (same, sharp
spike from center outward transition) |
| 0100 |
Lake Hylia (main entrance, white
fade-in) |
| 0101 |
Lake Hylia (same, black fade-in) |
| 0102 |
Lake Hylia (same, white fade-in) |
| 0103 |
Lake Hylia (same, black fade-in) |
| 0104 |
Lake Hylia (same) |
| 0105 |
Zora's Domain |
| 0106 |
Zora's Domain |
| 0107 |
Zora's Domain |
| 0108 |
Zora's Domain |
| 0109 |
Zora's Domain |
| 010A |
Zora's Domain |
| 010B |
Zora's Fountain (fall next to the
branch) |
| 010C |
Zora's Fountain |
| 010D |
Zora's Fountain |
| 010E |
Zora's Fountain |
| 010F |
Zora's Fountain |
| 0110 |
Zora's Fountain |
| 0111 |
Zora's Fountain |
| 0112 |
Zora's Fountain |
| 0113 |
Zora's Fountain |
| 0114 |
Zora's Fountain |
| 0115 |
Gerudo Valley |
| 0116 |
Gerudo Valley |
| 0117 |
Gerudo Valley |
| 0118 |
Gerudo Valley |
| 0119 |
Gerudo Valley |
| 011A |
Gerudo Valley |
| 011B |
Gerudo Valley |
| 011C |
Lost Woods (foggy) |
| 011D |
Lost Woods (foggy) |
| 011E |
Lost Woods (foggy) |
| 011F |
Lost Woods (foggy) |
| 0120 |
Lost Woods (foggy) |
| 0121 |
Desert Colossus |
| 0122 |
Desert Colossus |
| 0123 |
Desert Colossus |
| 0124 |
Desert Colossus |
| 0125 |
Desert Colossus |
| 0126 |
Desert Colossus |
| 0127 |
Gerudo's Fortress |
| 0128 |
Gerudo's Fortress |
| 0129 |
Gerudo's Fortress |
| 012A |
Gerudo's Fortress |
| 012B |
Gerudo's Fortress (circular black gradient
transition) |
| 012C |
Gerudo's Fortress |
| 012D |
Gerudo's Fortress |
| 012E |
Haunted Wasteland |
| 012F |
Haunted Wasteland |
| 0130 |
Haunted Wasteland |
| 0131 |
Haunted Wasteland |
| 0132 |
Ganon's Castle (Collapsing) |
| 0133 |
Ganon's Castle (Collapsing) |
| 0134 |
Ganon's Castle (Collapsing) |
| 0135 |
Ganon's Castle (Collapsing) |
| 0136 |
Hyrule Castle (Kid) |
| 0137 |
Hyrule Castle (Kid) |
| 0138 |
Ganon's Castle (Outside) |
| 0139 |
Ganon's Castle (Outside) |
| 013A |
Death Mountain Trail |
| 013B |
Death Mountain Trail |
| 013C |
Death Mountain Trail |
| 013D |
Death Mountain Trail |
| 013E |
Death Mountain Trail |
| 013F |
Death Mountain Trail |
| 0140 |
Death Mountain Trail |
| 0141 |
Death Mountain Trail |
| 0142 |
Death Mountain Trail |
| 0143 |
Death Mountain Trail |
| 0144 |
Death Mountain Trail |
| 0145 |
Death Mountain Crater |
| 0146 |
Death Mountain Crater |
| 0147 |
Death Mountain Crater |
| 0148 |
Death Mountain Crater |
| 0149 |
Death Mountain Crater |
| 014A |
Death Mountain Crater |
| 014B |
Goron City |
| 014C |
Goron City |
| 014D |
Goron City |
| 014E |
Goron City |
| 014F |
Goron City |
| 0150 |
Goron City |
| 0151 |
Zora's Domain (on King's Altar) |
| 0152 | Zora's Domain (on King's Altar) |
| 0153 |
Zora's Domain (on King's Altar) |
| 0154 |
Zora's Domain (on King's Altar) |
| 0155 |
Lon Lon Ranch |
| 0156 |
Lon Lon Ranch |
| 0157 |
Lon Lon Ranch |
| 0158 |
Lon Lon Ranch |
| 0159 | Lon Lon Ranch |
| 0169 |
Forest Temple |
| 016A |
Forest Temple |
| 016B |
Shooting Gallery |
| 016C |
Shooting Gallery |
| 016D |
Shooting Gallery |
| 016E |
Shooting Gallery |
| 016F |
Front of Temple of Time (Kid, Day) |
| 0170 |
Front of Temple of Time (Kid, Night) |
| 0171 |
Front of Temple of Time (Adult, Day) |
| 0172 |
Front of Temple of Time (Adult, Night) |
| 0173 |
Fire Temple (In Front of Boss Room) |
| 0174 |
Fire Temple (In Front of Boss Room) |
| 0175 |
Fire Temple (In Front of Boss Room) |
| 0176 |
Fire Temple (In Front of Boss Room) |
| 0177 |
Collapsing Ganon's Castle (with Zelda) |
| 0178 |
Collapsing Ganon's Castle (with Zelda) |
| 0179 |
Collapsing Ganon's Castle (with
Zelda) |
| 017A |
Collapsing Ganon's Castle (with Zelda) |
| 017B |
Hyrule Field (in front of Kakariko) |
| 017C |
Hyrule Field (in front of Kakariko) |
| 017D |
Hyrule Field (in front of Kakariko) |
| 017E |
Hyrule Field (in front of Kakariko) |
| 017F |
Hyrule Field (in front of Zora River,
land) |
| 0180 |
Hyrule Field (in front of Zora River,
land) |
| 0181 |
Hyrule Field (in front of Zora River,
land) |
| 0182 |
Hyrule Field (in front of Zora River,
land) |
| 0183 |
Hyrule Field (in front of Kokiri Forest) |
| 0184 |
Hyrule Field (in front of Kokiri Forest) |
| 0185 |
Hyrule Field (in front of Kokiri Forest) |
| 0186 |
Hyrule Field (in front of Kokiri Forest) |
| 0187 |
Hyrule Field (in front of Lake Hylia) |
| 0188 |
Hyrule Field (in front of Lake Hylia) |
| 0189 |
Hyrule Field (in front of Lake Hylia) |
| 018A |
Hyrule Field (in front of Lake Hylia) |
| 018B |
Hyrule Field (in front of Gerudo Valley) |
| 018C |
Hyrule Field (in front of Gerudo Valley) |
| 018D |
Hyrule Field (in front of Gerudo Valley) |
| 018E |
Kakariko Village (in front of Death
Mountain) |
| 018F |
Kakariko Village (in front of Death
Mountain) |
| 0190 |
Kakariko Village (in front of Death
Mountain) |
| 0191 |
Kakariko Village (in front of Death
Mountain) |
| 0192 |
Kakariko Village (in front of Graveyard) |
| 0193 |
Kakariko Village (in front of Graveyard) |
| 0194 |
Kakariko Village (in front of Graveyard) |
| 0195 |
Kakariko Village (in front of Graveyard) |
| 0196 |
Zora River (High above ridges in front
of waterfall) |
| 0197 |
Zora River (High above ridges in front
of waterfall) |
| 0198 |
Zora River (High above ridges in front
of waterfall) |
| 0199 |
Zora River (High above ridges in front
of waterfall) |
| 019A |
Zora River (High above ridges in front
of waterfall) |
| 019B |
Zora River (In front of Zora's Domain) |
| 019C |
Zora River (In front of Zora's Domain) |
| 019D |
Zora River (In front of Zora's Domain) |
| 019E |
Zora's Domain (in front of Zora Fountain) |
| 019F |
Zora's Domain (in front of Zora Fountain) |
| 0200 |
Kakariko Village (Exiting Bazaar) |
| 0201 | Kakariko Village (Exiting Bazaar) |
| 0202 |
Graveyard (Exiting from Shadow
Temple) |
| 0203 | Graveyard (Exiting from Shadow Temple) |
| 0204 |
Graveyard (Exiting from Shadow
Temple) |
| 0205 |
Graveyard (Exiting from Shadow
Temple) |
| 0206 |
Deku Tree Grove (Exiting Deku Tree,
Kid) |
| 0207 | Deku Tree Grove (Exiting Deku Tree, Kid) |
| 0208 |
Deku Tree Grove (Exiting Deku Tree,
Kid) |
| 0209 |
Deku Tree Grove (Exiting Deku Tree,
Adult) |
| 020A | Exit Great Deku Tree |
| 020B |
Exit Great Deku Tree |
| 020C |
Entrance to Kokiri Forest from Hyrule Field |
| 020D |
Entrance to Kokiri Forest from Hyrule Field |
| 020E | Entrance to Kokiri Forest from Hyrule Field |
| 020F |
Entrance to Kokiri Forest from Hyrule Field |
| 0210 |
Entrance to Kokiri Forest from Hyrule Field |
| 0211 |
Exit Link’s House |
| 0212 |
Exit Link’s House |
| 0213 |
Exit Link’s House |
| 0214 |
Exit Link’s House |
| 0215 |
Exit Forest Temple |
| 0216 |
Exit Forest Temple |
| 0217 |
Exit Forest Temple |
| 0218 |
Exit Forest Temple |
| 0219 |
Lake Hylia through Gerudo Valley river exit |
| 021A |
Lake Hylia through Gerudo Valley river exit |
| 021B |
Lake Hylia through Gerudo Valley river exit |
| 021C |
Lake Hylia through Gerudo Valley river exit |
| 021D |
Exit from Water Temple? (thrown across and into water from island) |
| 021E |
Exit from Water Temple? (thrown across and into water from island) |
| 021F |
Exit from Water Temple? (thrown across and into water from island) |
| 0220 |
Exit from Water Temple? (thrown across and into water from island) |
| 0221 |
Exit Jabu Jabu to Zora's Fountain |
| 0222 |
Exit Jabu Jabu to Zora's Fountain |
| 0223 |
Exit Jabu Jabu to Zora's Fountain |
| 0224 |
Exit Jabu Jabu to Zora's Fountain |
| 0225 |
Enter Zora's Fountain from Zora's Domain |
| 0226 |
Enter Zora's Fountain from Zora's Domain |
| 0227 |
Enter Zora's Fountain from Zora's Domain |
| 0228 |
Enter Zora's Fountain from Zora's Domain |
| 0229 |
Enter Gerudo's Fortress from Gerudo Valley (strange pushing motion at first enter causing you to reenter) |
| 022A |
Enter Gerudo's Fortress from Gerudo Valley (strange pushing motion at first enter causing you to reenter) |
| 022B |
Enter Gerudo's Fortress from Gerudo Valley (strange pushing motion at first enter causing you to reenter) |
| 022C |
Enter Gerudo's Fortress from Gerudo Valley (strange pushing motion at first enter causing you to reenter) |
| 022D | Gerudo Valley from Gerudo's Fortress |
| 022E |
Gerudo Valley from Gerudo's Fortress |
| 022F |
Gerudo Valley from Gerudo's Fortress |
| 0230 |
Gerudo Valley from Gerudo's Fortress |
| 0231 |
Gerudo's Fortress from bottom-most-left doorway |
| 0232 |
Gerudo's Fortress from bottom-most-left doorway |
| 0233 |
Gerudo's Fortress from bottom-most-left doorway |
| 0234 |
Gerudo's Fortress from bottom-most-left doorway |
| 0235 |
Gerudo's Fortress from bottom left doorway (one facing east inside the box area) |
| 0236 |
Gerudo's Fortress from bottom left doorway (one facing east inside the box area) |
| 0237 |
Gerudo's Fortress from bottom left doorway (one facing east inside the box area) |
| 0238 |
Gerudo's Fortress from bottom left doorway (one facing east inside the box area) |
| 0239 |
Gerudo's Fortess from bottom middle doorway (facing west inside box area) |
| 023A |
Gerudo's Fortess from bottom middle doorway (facing west inside box area) |
| 023B |
Gerudo's Fortess from bottom middle doorway (facing west inside box area) |
| 023C |
Gerudo's Fortess from bottom middle doorway (facing west inside box area) |
| 023D |
Hyrule Castle exit from crawl-waterfall |
| 023E |
Hyrule Castle exit from crawl-waterfall |
| 023F |
Exit Ganon's Castle (rainbow bridge exit) |
| 0240 |
Exit Ganon's Castle (rainbow bridge exit) |
| 0241 |
Hyrule Castle waterfall exit (spread needle transition effect) |
| 0242 |
Exit Dodongo's Cavern to Death Mountain Trail |
| 0243 |
Exit Dodongo's Cavern to Death Mountain Trail |
| 0244 |
Exit Dodongo's Cavern to Death Mountain Trail |
| 0245 |
Exit Dodongo's Cavern to Death Mountain Trail |
| 0246 |
Exit Goron City (statue exit) to Death Mountain Crater |
| 0247 |
Exit Goron City (statue exit) to Death Mountain Crater |
| 0248 |
Exit Goron City (statue exit) to Death Mountain Crater |
| 0249 |
Exit Goron City (statue exit) to Death Mountain Crater |
| 024A |
Death Mountain Crater from Fire Temple |
| 024B |
Death Mountain Crater from Fire Temple |
| 024C |
Death Mountain Crater from Fire Temple |
| 024D |
Death Mountain Crater from Fire Temple |
| 024E |
Exit Forest Temple boss door to inside Forest Temple (not possible under normal means) |
| 024F |
Exit Forest Temple boss door to inside Forest Temple (not possible under normal means) |
| 0250 |
Exit Forest Temple boss door to inside Forest Temple (not possible under normal means) |
| 0251 |
Exit Forest Temple boss door to inside Forest Temple (not possible under normal means) |
| 0252 |
Exit Inside the Deku Tree boss door to inside Inside the Deku Tree (not possible under normal means) |
| 0253 |
Exit Inside the Deku Tree boss door to inside Inside the Deku Tree (not possible under normal means) |
| 0254 |
Exit Inside the Deku Tree boss door to inside Inside the Deku Tree (not possible under normal means) |
| 0255 |
Exit Inside the Deku Tree boss door to inside Inside the Deku Tree (not possible under normal means) |
| 0256 |
Room inside collapsing Ganon's Tower (Iron Knuckle fight?) |
| 0257 |
Room inside collapsing Ganon's Tower (Iron Knuckle fight?) |
| 0258 |
Room inside collapsing Ganon's Tower (Iron Knuckle fight?) |
| 0259 |
Room inside collapsing Ganon's Tower (Iron Knuckle fight?) |
| 025A |
Kid Market from Hyrule Castle (day) |
| 025B |
Kid Market from Hyrule Castle (night) |
| 025C |
Adult Market from Hyrule Castle (day?) |
| 025D |
Adult Market from Hyrule Castle (night?) |
| 025E |
Kid Market from Temple (day) |
| 025F |
Kid Market from Temple (night) |
| 0260 |
Adult Market from Temple (day?) |
| 0261 |
Adult Market from Temple (night?) |
| 0262 |
Kid Market from top Alley (day) |
| 0263 |
Kid Market from top Alley (night) |
| 0264 |
Adult Market from top Alley (day?) (not accessable by normal means) |
| 0265 |
Adult Market from top Alley (night?) (not accessable by normal means) |
| 0266 |
Exit Kokiri Forest Shop |
| 0267 |
Exit Kokiri Forest Shop |
| 0268 |
Exit Kokiri Forest Shop |
| 0269 |
Exit Kokiri Forest Shop |
| 026A |
Exit House of the Know-It-All Brothers |
| 026B |
Exit House of the Know-It-All Brothers |
| 026C |
Exit House of the Know-It-All Brothers |
| 026D |
Exit House of the Know-It-All Brothers |
| 026E |
Exit Kid Lots o' Pots (day) |
| 026F |
Exit Kid Lots o' Pots (night) |
| 0270 |
Exit Adult Lots o' Pots (day?) |
| 0271 |
Exit Adult Lots o' Pots (night?) |
| 0272 |
Enter Link’s House |
| 0273 |
Enter Link’s House |
| 0274 |
Enter Link’s House |
| 0275 |
Enter Link’s House |
| 0276 |
Exit Kid Hyrule Field bridge to Market (day) |
| 0277 |
Exit Kid Hyrule Field bridge to Market (night) |
| 0278 |
Exit Adult Hyrule Field bridge to Market (day?) |
| 0279 |
Exit Adult Hyrule Field bridge to Market (night?) |
| 027A |
Exit Lake Hylia to Epona’s jump walls in Hyrule Field |
| 027B |
Exit Lake Hylia to Epona’s jump walls in Hyrule Field |
| 027C |
Exit Lake Hylia to Epona’s jump walls in Hyrule Field |
| 027D |
Drop in front of Hyrule Field bridge (Beta? Or possibly the exit after the Ocarina of Time obtainment cutscene) |
| 027E |
Drop in front of Hyrule Field bridge (Beta? Or possibly the exit after the Ocarina of Time obtainment cutscene) |
| 027F |
Drop in front of Hyrule Field bridge (Beta? Or possibly the exit after the Ocarina of Time obtainment cutscene) |
| 0280 |
Drop in front of Hyrule Field bridge (Beta? Or possibly the exit after the Ocarina of Time obtainment cutscene) |
| 0281 |
Walk out from grotto to the west of Hyrule Field bridge |
| 0282 |
Walk out from grotto to the west of Hyrule Field bridge |
| 0283 |
Walk out from grotto to the west of Hyrule Field bridge |
| 0284 |
Walk out from grotto to the west of Hyrule Field bridge |
| 0285 |
Exit Lost Woods to Kokiri Forest |
| 0286 |
Exit Lost Woods to Kokiri Forest |
| 0287 |
Exit Lost Woods to Kokiri Forest |
| 0288 |
Exit Lost Woods to Kokiri Forest |
| 0289 |
Exit Lost Woods to Kokiri Forest |
| 028A |
Epona jump exit from Lon-Lon Ranch? (south side) |
| 028B |
Epona jump exit from Lon-Lon Ranch? (south side) |
| 028C |
Epona jump exit from Lon-Lon Ranch? (south side) |
| 028D |
Epona jump exit from Lon-Lon Ranch? (west side) |
| 028E |
Epona jump exit from Lon-Lon Ranch? (west side) |
| 028F |
Epona jump exit from Lon-Lon Ranch? (west side) |
| 0290 |
Epona jump exit from Lon-Lon Ranch? (west side) |
| 0291 |
Epona jump exit from Lon-Lon Ranch? (east side) |
| 0292 |
Epona jump exit from Lon-Lon Ranch? (east side) |
| 0293 |
Epona jump exit from Lon-Lon Ranch? (east side) |
| 0294 |
Epona jump exit from Lon-Lon Ranch? (east side) |
| 0295 |
Exit Zelda's Courtyard to Castle Courtyard |
| 0296 |
Exit Zelda's Courtyard to Castle Courtyard |
| 0297 |
Enter Castle Courtyard though crawlspace (night) |
| 0298 |
Exit Zelda's Courtyard to Castle Courtyard |
| 0299 |
Enter Castle Courtyard though crawlspace (night) |
| 029A |
Enter Back Alley (bottom entrance) (night) |
| 029B |
Enter Back Alley (bottom entrance) (day) |
| 029C |
Enter Back Alley (bottom entrance) (night) |
| 029D |
Enter Back Alley (bottom entrance) (day) |
| 029E |
Enter Market from Back Alley (bottom entrance) (day) |
| 029F |
Enter Market from Back Alley (bottom entrance) (night) |
| 0300 |
Kakariko Village house (where you find Talon sleeping in) |
| 0301 |
Jabu Jabu Boss Arena |
| 0302 |
Jabu Jabu Boss Arena |
| 0303 |
Jabu Jabu Boss Arena |
| 0304 |
Jabu Jabu Boss Arena |
| 0305 |
Fire Temple Boss Arena |
| 0306 |
Fire Temple Boss Arena |
| 0307 |
Fire Temple Boss Arena |
| 0308 |
Fire Temple Boss Arena |
| 0309 |
Exit Fishing Pond to Lake Hylia |
| 030A |
Exit Fishing Pond to Lake Hylia |
| 030B |
Exit Fishing Pond to Lake Hylia |
| 030C |
Exit Fishing Pond to Lake Hylia |
| 030D |
Gravekeeper's Hut |
| 030E |
Gravekeeper's Hut |
| 030F |
Gravekeeper's Hut |
| 0310 |
Gravekeeper's Hut |
| 0311 |
Exit Zora's River to Hyrule Field (water) |
| 0312 |
Exit Zora's River to Hyrule Field (water) |
| 0313 |
Exit Zora's River to Hyrule Field (water) |
| 0314 |
Death Mountain Trail Great Fairy's Fountain |
| 0315 |
Death Mountain Trail Great Fairy's Fountain |
| 0316 |
Death Mountain Trail Great Fairy's Fountain |
| 0317 |
Death Mountain Trail Great Fairy's Fountain |
| 0318 |
Death Mountain Trail Great Fairy's Fountain |
| 0319 |
Death Mountain Trail Great Fairy's Fountain |
| 031A |
Death Mountain Trail Great Fairy's Fountain |
| 031B |
Death Mountain Trail Great Fairy's Fountain |
| 031C |
Graveyard Grotto slightly south-west of Family Tombstone (redead) |
| 031D |
Graveyard Grotto slightly south-west of Family Tombstone (redead) |
| 031E |
Graveyard Grotto slightly south-west of Family Tombstone (redead) |
| 031F |
Graveyard Grotto slightly south-west of Family Tombstone (redead) |
| 0320 |
Temple of Time (in front of tablets facing doorway out) |
| 0321 |
Temple of Time (in front of tablets facing doorway out) |
| 0322 |
Temple of Time (in front of tablets facing doorway out) |
| 0323 |
Temple of Time (in front of tablets facing doorway out) |
| 0324 |
Temple of Time (aside pedistal) (sword light ring effect lasts a while) |
| 0325 |
Temple of Time (aside pedistal) (no sword light ring effect) |
| 0326 |
Temple of Time (aside pedistal) (no sword light ring effect) |
| 0327 |
Temple of Time (aside pedistal) (no sword light ring effect) |
| 0328 |
Zora's Domain from underwater doorway |
| 0329 |
Zora's Domain from underwater doorway |
| 032A |
Zora's Domain from underwater doorway |
| 032B |
Zora's Domain from underwater doorway |
| 032C |
Just defeated Ganondorf cutscene |
| 032D |
Just defeated Ganondorf cutscene |
| 032E |
Just defeated Ganondorf cutscene |
| 032F |
Just defeated Ganondorf cutscene |
| 0330 |
Just defeated Ganondorf cutscene |
| 0331 |
Just defeated Ganondorf cutscene |
| 0332 |
Just defeated Ganondorf cutscene |
| 0333 |
Just defeated Ganondorf cutscene |
| 0334 |
Just defeated Ganondorf cutscene |
| 0335 |
Just defeated Ganondorf cutscene |
| 0336 |
Just defeated Ganondorf cutscene |
| 0337 |
Just defeated Ganondorf cutscene |
| 0338 |
On top of Link's house (BETA?) |
| 0339 |
On top of Link's house (BETA?) |
| 033A |
On top of Link's house (BETA?) |
| 033B |
On top of Link's house (BETA?) |
| 033C |
Exit House of Twins |
| 033D |
Exit House of Twins |
| 033E |
Exit House of Twins |
| 033F |
Exit House of Twins |
| 0340 |
Exit Din's Fire Fairy Fountain |
| 0341 |
Exit Din's Fire Fairy Fountain |
| 0342 |
Exit Golden Gauntlets Fairy Fountain |
| 0343 |
Exit Golden Gauntlets Fairy Fountain |
| 0344 |
Exit Din's Fire Fairy Fountain with Spread Needle Fade-in effect |
| 0345 |
Exit Impa's Ex-house (Kakariko) |
| 0346 |
Exit Impa's Ex-house (Kakariko) |
| 0347 |
Exit Impa's Ex-house (Kakariko) |
| 0348 |
Exit Impa's Ex-house (Kakariko) |
| 0349 |
Exit Kakariko house that Talon slept in |
| 034A |
Exit Kakariko house that Talon slept in |
| 034B |
Exit Kakariko house that Talon slept in |
| 034C |
Exit Kakariko house that Talon slept in |
| 034D |
Exit Granny's Potion Shop (Kakariko) |
| 034E |
Exit Granny's Potion Shop (Kakariko) |
| 034F |
Exit Granny's Potion Shop (Kakariko) |
| 036B
|
Fairy Fountain (Strange Exit) | 0370 |
Great Fairy Fountain (Zora's
Fountain) |
| 037F |
Zora Shop |
| 0385 |
Potion Shop (Kakariko Village) |
| 039F |
Carpenter's Tent |
| 03AF |
Horse Archery Range |
| 03B3 |
Prison Cell |
| 03BF |
Exiting Bombchu Store (Back Alley) |
| 0400 | Castle Courtyard |
| 0410 | Gohma's Lair |
| 0420 | First Battle with Ganondorf |
| 0483 |
Death Mountain Crater |
| 04BA |
Top of Ganon's Castle |
| 0500 | Kakariko Village (Exiting Back of Potion Shop) |
| 0501 | Windmill |
| 0555 |
Kakariko Village |
| 0559 |
Starting Line at Lon Lon Ranch |
| 0568 |
Graveyard (Entrance to Shadow
Temple) |
| 0588 |
Fairy Fountain |
|
|
|
|
|
|
|
|
|
|
|
|
|
|
|
| 3333 |
Crashes |
Zelda Cutscene Viewer: Using this code allows you
to watch cinema scenes without actually playing the game. There are
only 9 cutscenes you can see with this code, however, if you find any
more when tinkering with this code, let me
know! Please note that during some cutscenes (those marked with an
asterisk *), pressing A, B, or Start will result in the game getting stuck.
To avoid this, use C-Up to continue any text messages. Also, since
this takes place in the Beta Quest, you may need to activate the No Name
Glitch code in order for the game to work properly.
|
|
|
|
|
|
|
|
|
|
|
|
|
|
|
|
|
|
|
|
|
|
|
|
|
|
|
Warp Song Modifier: As requested by the author, the values will not be listed until I have his permission. You can view it instead through Odyssey of Hyrule. If you have any questions about the code, feel free to ask me or the author.
Background SFX in Frozen Cutscene: This code requires the Beta Quest code to be on (you can use either Beta Quest or Play Beta Quest as a Kid. Both will work). I'm not sure what it's supposed to do, but I'll try it out soon.
Cutscene Freeze With Reactivator: This code will tell the camera to lock its position after it's done moving, freezing the cutscene. Press L to freeze the camera, and R to restore it.
Horse Speed Modifier: This code will modify the speed of your horse when you are racing Ingo (works with both the regular horse and Epona). While keeping the joystick UP (just up, can't be to the left or right), press and hold R to make the horse go very fast. Release R and press L to slow down very fast. When you need to turn just release R and make your turn.
| 00 | No Shield |
| 01 | Kokiri Shield (Invisible as adult) |
| 02 | Hylian Shield |
| 03 | Mirror Shield |
| 04 | Master Sword in Sheath |
| 05 | Master Sword in Sheath |
| 06 | Upside-down Hylian Shield |
| 07 | Upside-down Mirror Shield |
| 08 | Looks like Hylian Shield when not used, invisible when pulled out |
| 09 | Looks like Mirror Shield when not used, invisible when pulled out |
| 0A | No shield when not used, empty sword case when pulled out |
| 0B | Empty sword case when not used, empty sword case when pulled out |
| 0C | Biggoron's Sword when not used (with Link's hand!), sword case and upside-down Hylian Shield when pulled out |
| 0D | Master sword (with Link's hand) when not used, swordcase and upside-down mirror shield when pulled out |
| 0E | Link's hand when not used, nothing when used |
| 0F | Link's hand when not used, sword case when used |
| 10 | Master sword with Link's hand when not used, Biggoron's sword (colorless) when pulled out |
| 11 | Master sword with Link's hand when not used, broken Giant's Knife (colorless) when pulled out |
| 12 | Link's hand when not used, nothing when used |
| 13 | Link's hand when not used, nothing when used |
| 14 | Bow with Link's hand when not used, Master Sword (colorless) when pulled out |
| 15 | Master Sword in Sheath when not used, Master Sword (colorless) when pulled out |
| 16 | Swordcase when not used, nothing when used |
| 17 | A green backpack, maybe? Or quiver? Nothing when used |
| 18 | Bow with Link's hand when not used, bow when used |
| 19 | Ocarina of Time with Link's hand when not used, swordcase with sword inside when pulled out |
| 1A | Ocarina of Time with Link's hand when not used, swordcase when pulled out |
| 1B | Hookshot with Link's hand when not used, invisible when pulled out |
| 1C | Megaton Hammer with Link's hand when not used, bow when pulled out |
| 1D | Link's hand when not used, Ocarina of Time when pulled out |
| 1E | Part of Link's hand when not used, Ocarina of Time when pulled out |
| 1F | Looks like Link has been stabbed with a stake with an egg on top when not used, Hookshot when pulled out |
| 20 | Nothing when not used, Megaton Hammer when pulled out |
| Value |
Version |
| 00 |
Child Link, Day |
| 01 |
Child Link, Night |
| 02 |
Adult Link, Day |
| 03 |
Adult Link, Night |
| 04 |
Cutscene 1 |
| 05 |
Cutscene 2 |
| 06 |
Cutscene 3 |
| 07 |
Cutscene 4 |
| etc. |
etc. |
| Value |
Description |
| 00 |
Interface On |
| 01 |
Interface Off |
| 02 |
File Select Only |
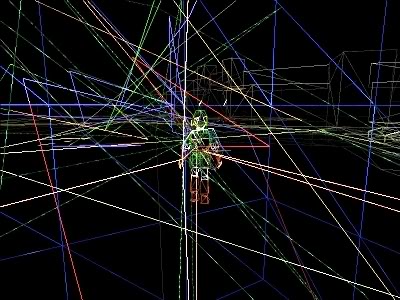
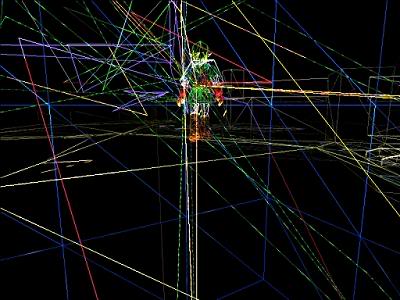
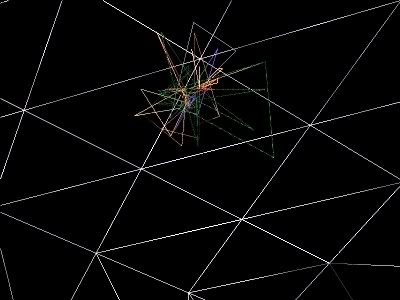
Flat Textures: This code will essentially
prevent the game from applying textures to objects and instead color
the polygons based either on an average from the texture or from the
color coordinates assigned to their vertices. In other words, the
code makes it so that the game can't use any of its images on objects
that it draws. So Link, for example, will still have the same
green outfit, but his face will be gone because the textures that make
up his face won't draw onto its polygons. Though we're not
precisely certain how it chooses the color that is applied onto the
objects, it's possible that it figures out what the most-often-used
color is for that object and simply draw it in that color, but that's
just a theory.
At any rate, there is no real practical value to this code, but it is
pretty fun. Also, it's important to note that this code will not
work with emulators. We're not certain why this happens, though
it might be because the graphics plugins either don't understand the
commands, are ignoring them, or the emulator itself isn't understanding
them. So do it on the good ol' N64 instead.
A+B Reversed: This little doozy of a code is
one step closer to a dream come true. It unfortunately is only a
cosmetic change, but it can at least impress your friends. Or
make them look at you funny. At any rate, the code will simply
rearrange the buttons as they appear on the screen to give the
impression that you are playing a beta version of the game. We
have yet to figure out how to make this actually affect your controller
as well, but I suppose you could change the button settings in your
emulator... if there does exist a code, however, we'll likely find it
someday.
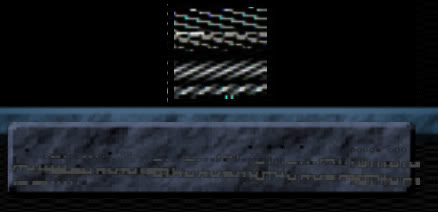
Fade-In Transition Modifier: This code is
cool, there's no denying it. With this, you can change the
transition the game uses every time it loads a new area. It can
be handy for skipping the longer fades, or for looking at some of
the older versions that they left in. There's even one with the
Triforce, which is super-awesome. Unfortunately, making the
fade-out transition modifier is proving to be difficult, but we will
manage it someday. In the meantime, here's a list of different
transitions you can use!
| Value |
Description |
| 00 |
Really bad expanding point transition |
| 01 |
Spinning Triforce |
| 02 |
Black Bars on Top/Bottom |
| 03 |
White Flash with Black Bars |
| 04 |
Same as 02 |
| 05 |
Same as 03 |
| 06 |
Same as 02 |
| 07 |
Same as 03 |
| 08 |
Same as 00 |
| 09 |
White Flash and Black Bars |
| 0A |
Same as 09 |
| 0B |
Really Fast Black Bars |
| 0C |
Really Fast White Flash |
| 0D |
Pure White (can see with wireframe) |
| 0E |
Wasteland with Dust Storm Effect |
| 0F |
Wasteland without Dust Storm Effect |
| 10 |
Pure Black (can see with wireframe) |
| 11 |
Really Really Fast White Flash |
| 12 |
Tan-Tone Fade-In (for Lost Woods) |
| 13 |
Cyan-Tone Fade-In (not sure where) |
Sandstorm Generator: This code will create
the sandstorm effect that you find in the Desert Wasteland. It
can also serve as a way to turn off the sandstorm effect, if you find
it particularly annoying. It can be very useful for clearing up
your screen, for example, when looking for those darn posts as a child.
| Value |
Description |
| 00 |
Off |
| 01 |
Fade-In to Full |
| 02 |
Active |
| 03 |
Active |
| 04 |
Fade-Out and Off |
| 05 |
Pulsing Fade-Out |
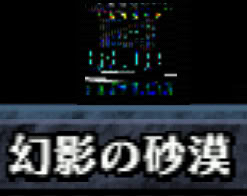
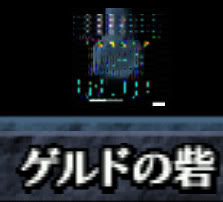
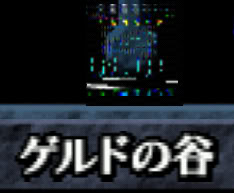
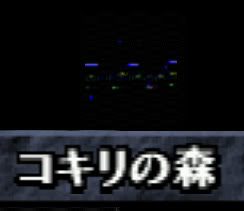
Start Menu Map Text Modifier: Unfortunately,
all of the place names are the ones you'd find in the real game.
No remnants of the Wind or Ice Temples here. However, you can
make it display whatever you want, and here's the list of values and
what text it'll show:
| Value |
Text Displayed |
| 00 |
Hyrule Field |
| 01 |
Kakariko Village |
| 02 |
Graveyard |
| 03 |
Zora's River |
| 04 |
Kokiri Forest |
| 05 |
Sacred Forest Meadow |
| 06 |
Lake Hylia |
| 07 |
Zora's Domain |
| 08 |
Zora's Fountain |
| 09 |
Gerudo Valley |
| 0A |
Lost Woods |
| 0B |
Desert Colossus |
| 0C |
Gerudo's Fortress |
| 0D |
Haunted Wasteland |
| 0E |
Market |
| 0F |
Hyrule Castle |
| 10 |
Death Mountain Trail |
| 11 |
Death Mountain Crater |
| 12 |
Goron City |
| 13 |
Lon Lon Ranch |
| 14 |
? (Windmill) |
| 15 |
Ganon's Castle |
| Value |
Minuet of Forest & Serenade of Water |
Bolero of Fire |
Prelude of Light & Nocturne of Shadow |
Requiem of Spirit |
| 00 |
Sacred Forest Meadow |
Castle Courtyard | Windmill |
Lake Hylia #2 |
| 01 |
Lake Hylia |
Castle Courtyard | Windmill | Lake Hylia #2 |
| 02 |
Lake Hylia | Castle Courtyard | Windmill | Lake Hylia #2 |
| 03 |
Lake Hylia | Castle Courtyard | Windmill | Lake Hylia #2 |
| 04 |
Lake Hylia | Castle Courtyard | Bombchu Bowling Alley |
Lake Hylia #2 |
| 05 |
Sacred Forest Meadow | Inside Jabu-Jabu's Belly [I] |
Bombchu Bowling Alley | Zora's Domain |
| 06 |
Sacred Forest Meadow | Inside Jabu-Jabu's Belly [I] |
Bombchu Bowling Alley | Zora's Domain |
| 07 |
Sacred Forest Meadow | Inside Jabu-Jabu's Belly [I] |
Bombchu Bowling Alley | Zora's Domain |
| 08 |
Sacred Forest Meadow | Dodongo's Cavern - Boss |
Graveyard #2 |
Zora's Domain |
| 09 |
Lake Hylia | Dodongo's Cavern - Boss |
Graveyard #2 |
Zora's Domain |
| 0A |
Lake Hylia | Dodongo's Cavern - Boss |
Graveyard #2 |
Zora's Domain |
| 0B |
Lake Hylia | Dodongo's Cavern - Boss |
Graveyard #2 |
Zora's Domain |
| 0C |
Lake Hylia | Dodongo's Cavern - Boss |
Hyrule Field |
Zora's Fountain [I] |
| 0D |
Desert Colossus |
Inside the Deku Tree - Boss |
Hyrule Field | Zora's Fountain [I] |
| 0E |
Desert Colossus | Inside the Deku Tree - Boss |
Hyrule Field | Zora's Fountain [I] |
| 0F |
Desert Colossus | Inside the Deku Tree - Boss |
Hyrule Field | Zora's Fountain [I] |
| 10 |
Desert Colossus | Inside the Deku Tree - Boss |
Hyrule Field | Zora's Fountain [I] |
| 11 |
Inside Jabu-Jabu's Belly |
Shadow Temple - Boss |
Kakariko Village |
Zora's Fountain [I] |
| 12 |
Inside Jabu-Jabu's Belly | Shadow Temple - Boss |
Kakariko Village | Zora's Fountain [I] |
| 13 |
Dodongo's Cavern [W] |
Shadow Temple - Boss |
Kakariko Village | Zora's Fountain [I] |
| 14 |
Dodongo's Cavern [W] |
Water Temple - Boss |
Ganon - Final Battle |
Zora's Fountain [I] |
| 15 |
Dodongo's Cavern [W] |
Water Temple - Boss |
Ganon - Final Battle | Gerudo Valley |
| 16 |
Dodongo's Cavern #2 [W] |
Water Temple - Boss |
Ganon - Final Battle | Gerudo Valley |
| 17 |
Dodongo's Cavern | Water Temple - Boss |
Ganon - Final Battle | Gerudo Valley |
| 18 |
Dodongo's Cavern #3 [W] |
Water Temple - Boss |
Ganon - Final Battle | Gerudo Valley |
| 19 |
Dodongo's Cavern #3 [W] |
Inside Ganon's Castle - Tower |
Ganon - Final Battle | Gerudo Valley |
| 1A |
Dodongo's Cavern #4 [W] |
Inside Ganon's Castle - Tower |
Top of Ganon's Tower |
Gerudo Valley |
| 1B |
Inside Jabu-Jabu's Belly [F] |
Inside Ganon's Castle - Tower |
Top of Ganon's Tower | Lost Woods |
| 1C |
Inside Jabu-Jabu's Belly [W] |
Ganon - First Battle | Top of Ganon's Tower | Lost Woods |
| 1D |
Dodongo's Cavern #4 [W] |
Ganon - First Battle | *FREEZE* |
Lost Woods |
| 1E |
Dodongo's Cavern #4 [W] |
Ganon - First Battle | *FREEZE* | Lost Woods |
| 1F |
*FREEZE* | Ganon - First Battle | *FREEZE* | Lost Woods |
| 20 |
*FREEZE* | Ganon - Final Battle | *FREEZE* | Desert Colossus #2 |
| 21 |
*FREEZE* | Water Temple [I] |
*FREEZE* | Desert Colossus #2 |
| 22 |
Dodongo's Cavern | Water Temple [I] |
Top of Ganon's Tower | Desert Colossus #2 |
| 23 |
Dodongo's Cavern | Water Temple [I] |
Top of Ganon's Tower | Desert Colossus #2 |
| 24 |
Dodongo's Cavern | Water Temple [I] |
Top of Ganon's Tower | Desert Colossus #2 |
| 25 |
*FREEZE* | Inside Ganon's Castle - Room Before Ganon |
Bombchu Shop |
Gerudo Fortress |
| 26 |
*FREEZE* | Inside Ganon's Castle - Room Before Ganon |
Bombchu Shop | Gerudo Fortress |
| 27 |
Dodongo's Cavern | Inside Ganon's Castle - Room Before Ganon |
Bombchu Shop | Gerudo Fortress |
| 28 |
Dodongo's Cavern | Inside Ganon's Castle - Room With Pillar |
Bombchu Shop | Gerudo Fortress |
| 29 |
*FREEZE* | Inside Ganon's Castle - Room With Pillar |
Bazaar |
Gerudo Fortress |
| 2A |
Inside Jabu-Jabu's Belly [F] |
Inside Ganon's Castle - Room With Pillar |
Bazaar | Gerudo Fortress |
| 2B |
Inside Jabu-Jabu's Belly #2 [W] |
Inside Ganon's Castle - Room With Pillar |
Bazaar | Gerudo Fortress |
| 2C |
Dodongo's Cavern #4 [W] |
Lon Lon Ranch | Bazaar | Gerudo Fortress |
| 2D |
Dodongo's Cavern #4 [W] |
Lon Lon Ranch | Happy Mask Shop |
Haunted Wasteland |
| 2E |
*FREEZE* | Lon Lon Ranch | Happy Mask Shop | Haunted Wasteland |
| 2F |
Inside Jabu-Jabu's Belly [W] |
Lon Lon Ranch | Happy Mask Shop | Haunted Wasteland |
| 30 |
*FREEZE* | Mido's House |
Happy Mask Shop | Haunted Wasteland |
| 31 |
Dodongo's Cavern #4 [W] |
Mido's House | Entrance to Ganon's Tower |
Ganon's Castle (Burning) |
| 32 |
Dodongo's Cavern #4 [W] |
Mido's House | Entrance to Ganon's Tower | Ganon's Castle (Burning) |
| 33 |
*FREEZE* | Mido's House | Entrance to Ganon's Tower | Ganon's Castle (Burning) |
| 34 |
Inside Jabu-Jabu's Belly [W] |
Saria's House |
Entrance to Ganon's Tower | Ganon's Castle (Burning) |
| 35 |
*FREEZE* | Saria's House | Inside Ganon's Castle - Forest Door |
Hyrule Castle |
| 36 |
Dodongo's Cavern |
Saria's House | Inside Ganon's Castle - Forest Door |
Hyrule Castle |
| 37 |
Dodongo's Cavern | Saria's House | Inside Ganon's Castle - Forest Door |
Ganon's Castle |
| 38 |
*FREEZE* | Bearded Man's House |
Inside Ganon's Castle - Forest Door |
Ganon's Castle |
| 39 |
*FREEZE* | Bearded Man's House | Inside Ganon's Castle - Water Door |
Ganon's Castle |
| 3A |
*FREEZE* | Bearded Man's House | Inside Ganon's Castle - Water Door |
Death Mountain Trail |
| 3B |
*FREEZE* | Bearded Man's House | Inside Ganon's Castle - Water Door |
Death Mountain Trail |
| 3C |
*FREEZE* | Bearded Man's House | Inside Ganon's Castle - Water Door |
Death Mountain Trail |
| 3D |
*FREEZE* | Top of Ganon's Castle |
Inside Ganon's Castle - Shadow Door | Death Mountail Trail |
| 3E |
*FREEZE* | Top of Ganon's Castle | Inside Ganon's Castle - Shadow Door |
Death Mountain Trail |
| 3F |
*FREEZE* | Top of Ganon's Castle | Inside Ganon's Castle - Shadow Door |
Death Mountain Trail |
| 40 |
Dodongo's Cavern #4 [W] |
Kokiri Forest - Outside Mido's House |
Inside Ganon's Castle - Shadow Door |
Death Mountain Trail |
| 41 |
Dodongo's Cavern #4 [W] |
Kokiri Forest - Outside Mido's House | Inside Ganon's Castle - Shadow Door |
Death Mountain Trail |
| 42 |
*FREEZE* | Kokiri Forest - Outside Mido's House | Inside Ganon's Castle - Fire Door |
Death Mountain Trail |
| 43 |
Inside Jabu-Jabu's Belly | Kokiri Forest - Outside Mido's House | Inside Ganon's Castle - Fire Door |
Death Mountain Trail |
| 44 |
*FREEZE* | Kokiri Forest - Outside Saria's House | Inside Ganon's Castle - Fire Door |
Death Mountain Crater #2 |
| 45 |
Inside the Deku Tree |
Kokiri Forest - Outside Saria's House | Inside Ganon's Castle - Light Door |
Death Mountain Crater #2 |
| 46 |
Inside the Deku Tree | Kokiri Forest - Outside Saria's House | Inside Ganon's Castle - Light Door |
Death Mountain Crater #2 |
| 47 |
Inside Jabu-Jabu's Belly | Kokiri Forest - Outside Saria's House | Inside Ganon's Castle - Light Door |
Death Mountain Crater #2 |
| 48 |
*FREEZE* | Kakariko Village #2 |
Inside Ganon's Castle - Light Door |
Death Mountain Crater #2 |
| 49 |
*FREEZE* | Kakariko Village #2 |
Inside Ganon's Castle - Spirit Door |
Death Mountain Crater #2 |
| 4A |
Dodongo's Cavern #4 [W] |
Kakariko Village #2 |
Inside Ganon's Castle - Spirit Door |
Goron City |
| 4B |
Dodongo's Cavern #4 [W] |
Kakariko Village #2 |
Inside Ganon's Castle - Spirit Door |
Goron City |
| 4C |
*FREEZE* | Dampé's Race |
Inside Ganon's Castle - Spirit Door |
Goron City |
| 4D |
*FREEZE* | Dampé's Race | Skulltula House |
Goron City |
| 4E |
*FREEZE* | Dampé's Race | Skulltula House | Goron City |
| 4F |
Dodongo's Cavern #5 [W] |
Dampé's Race | Skulltula House | Goron City |
| 50 |
Dodongo's Cavern #5 [W] |
Windmill #2 |
Skulltula House | Zora's Domain #2 |
| 51 |
*FREEZE* | Windmill #2 |
Kakariko Village - On Impa's House |
Zora's Domain #2 |
| 52 |
*FREEZE* | Windmill #2 |
Kakariko Village - On Impa's House |
Zora's Domain #2 |
| 53 |
*FREEZE* | Windmill #2 |
Kakariko Village - On Impa's House |
Zora's Domain #2 |
| 54 |
Dodongo's Cavern #4 [W] |
Kokiri Forest |
Kakariko Village - On Impa's House |
Lon Lon Ranch #2 |
| 55 |
Dodongo's Cavern #4 [W] |
Kokiri Forest | Lon Lon Ranch #3 |
Lon Lon Ranch #2 |
| 56 |
*FREEZE* | Kokiri Forest | Lon Lon Ranch #3 |
Lon Lon Ranch #2 |
| 57 |
*FREEZE* | Kokiri Forest | Lon Lon Ranch #3 |
Lon Lon Ranch #2 |
| 58 |
Dodongo's Cavern #4 [W] |
Death Mountain Trail - Peak |
Lon Lon Ranch #3 |
Lon Lon Ranch #2 |
| 59 |
*FREEZE* | Death Mountain Trail - Peak | Lon Lon Ranch #3 |
Lon Lon Ranch #2 |
| 5A |
Inside the Deku Tree | Death Mountain Trail - Peak | Lon Lon Ranch #3 |
Lon Lon Ranch #2 |
| 5B |
Inside the Deku Tree | Death Mountain Trail - Peak | Lon Lon Ranch #3 |
Lon Lon Ranch #2 |
| 5C |
*FREEZE* | Fishing Pond |
Lon Lon Ranch #3 |
Lon Lon Ranch #2 |
| 5D |
*FREEZE* | Fishing Pond |
Lake Hylia [I] |
Lon Lon Ranch #2 |
| 5E |
*FREEZE* | Fishing Pond |
Lake Hylia [I] |
Lon Lon Ranch #2 |
| 5F |
Inside the Deku Tree | Fishing Pond |
Lake Hylia [I] |
Lon Lon Ranch #2 |
| 60 |
Inside the Deku Tree | Kakariko Village #3 |
Lake Hylia [I] |
Lon Lon Ranch #2 |
| 61 |
*FREEZE* | Kakariko Village #3 |
Death Mountain Trail |
Lon Lon Ranch #2 |
| 62 |
*FREEZE* | Kakariko Village #3 |
Death Mountain Trail | Fire Temple |
| 63 |
Dodongo's Cavern #5 [W] |
Kakariko Village #3 |
Death Mountain Trail | Fire Temple |
| 64 |
Dodongo's Cavern #5 [W] |
Kakariko Village #3 |
Death Mountain Trail | Fire Temple |
| 65 |
Inside the Deku Tree | Inside Ganon's Castle | Graveyard | Fire Temple |
| 66 |
*FREEZE* | Inside Ganon's Castle | Graveyard | Forest Temple |
| 67 |
*FREEZE* | Inside Ganon's Castle | Graveyard | Forest Temple |
| 68 |
Inside the Deku Tree | Inside Ganon's Castle | Graveyard | Forest Temple |
| 69 |
Inside the Deku Tree | Inside Ganon's Castle | Graveyard |
Forest Temple |
| 6A |
Inside the Deku Tree | Inside Ganon's Castle #2 |
Ganon's Castle (Burning) |
Forest Temple |
| 6B |
*FREEZE* | Inside Ganon's Castle #2 |
Ganon's Castle (Burning) |
Shooting Gallery |
| 6C |
*FREEZE* | Inside Ganon's Castle #2 |
Ganon's Castle (Burning) |
Shooting Gallery |
| 6D |
Inside the Deku Tree | Inside Ganon's Castle #2 |
Ganon's Castle (Burning) |
Shooting Gallery |
| 6E |
*FREEZE* | Inside Ganon's Castle #2 |
Thieves' Hideout |
*FREEZE* |
| 6F |
Inside the Deku Tree | *FREEZE* | Thieves' Hideout | *FREEZE* |
| 70 |
*FREEZE* | *FREEZE* | Thieves' Hideout | *FREEZE* |
| 71 |
*FREEZE* | *FREEZE* | Thieves' Hideout | *FREEZE* |
| 72 |
Inside the Deku Tree | *FREEZE* | Thieves' Hideout | Fire Temple #2 |
| 73 |
Inside the Deku Tree | Hyrule Field #2 |
Royal Family's Tomb | Fire Temple #2 |
| 74 |
Inside the Deku Tree | Hyrule Field #2 |
Royal Family's Tomb | Fire Temple #2 |
| 75 |
*FREEZE* | Hyrule Field #2 |
Royal Family's Tomb | Fire Temple #2 |
| 76 |
*FREEZE* | Hyrule Field #2 |
Royal Family's Tomb | Ganon's Castle (Burning) - Room With Pillar |
| 77 |
*FREEZE* | Death Mountain Trail #2 |
Great Fairy's Fountain 1 |
Ganon's Castle (Burning) - Room With Pillar |
| 78 |
Inside the Deku Tree | Death Mountain Trail #2 |
Great Fairy's Fountain 1 | Ganon's Castle (Burning) - Room With Pillar |
| 79 |
Inside the Deku Tree | Death Mountain Trail #2 |
Desert Colossus #3 |
Ganon's Castle (Burning) - Room With Pillar |
| 7A |
Dodongo's Cavern | Death Mountain Trail #2 |
Desert Colossus #3 |
Ganon's Castle (Burning) - Room With Pillar |
| 7B |
*FREEZE* | Death Mountain Trail #2 |
Desert Colossus #3 |
Hyrule Field - Kakariko Entrance |
| 7C |
*FREEZE* | Hyrule Castle - Gate |
Desert Colossus #3 |
Hyrule Field - Kakariko Entrance |
| 7D |
*FREEZE* | Hyrule Castle - Gate | Graveyard | Hyrule Field - Kakariko Entrance |
| 7E |
*FREEZE* | Hyrule Castle - Gate | Graveyard | Hyrule Field - Zora's River Entrance |
| 7F |
*FREEZE* | Hyrule Castle - Gate | Graveyard | Hyrule Field - Zora's River Entrance |
| 80 |
Inside Jabu-Jabu's Belly | Death Mountain Crater #3 |
Graveyard | Hyrule Field - Zora's River Entrance |
| 81 |
Inside Jabu-Jabu's Belly | Death Mountain Crater #3 |
Forest Temple - Room Without Floor |
Hyrule Field - Zora's River Entrance |
| 82 |
Inside the Deku Tree | Death Mountain Crater #3 |
Forest Temple - Room Without Floor |
Hyrule Field - Kokiri Forest Entrance |
| 83 |
Inside the Deku Tree | Death Mountain Crater #3 |
Forest Temple - Room Without Floor |
Hyrule Field - Kokiri Forest Entrance |
| 84 |
*FREEZE* | Thieves' Hideout #2 |
Forest Temple - Room Without Floor |
Hyrule Field - Kokiri Forest Entrance |
| 85 |
Inside Jabu-Jabu's Belly | Thieves' Hideout #2 |
Great Fairy's Fountain 2 |
Hyrule Field - Kokiri Forest Entrance |
| 86 |
Inside Jabu-Jabu's Belly | Thieves' Hideout #2 |
Great Fairy's Fountain 2 |
Hyrule Field - Kokiri Forest Entrance |
| 87 |
Inside the Deku Tree | Thieves' Hideout #2 |
Great Fairy's Fountain 2 |
Hyrule Field - Lake Hylia Entrance |
| 88 |
Inside the Deku Tree | Thieves' Hideout #3 |
Great Fairy's Fountain 2 |
Hyrule Field - Lake Hylia Entrance |
| 89 |
Inside the Deku Tree | Thieves' Hideout #3 |
Great Fairy's Fountain 2 |
Hyrule Field - Lake Hylia Entrance |
| 8A |
Inside Jabu-Jabu's Belly [W] |
Thieves' Hideout #3 |
Temple of Time #2 |
Hyrule Field - Lake Hylia Entrance |
| 8B |
Inside Jabu-Jabu's Belly [W] |
Thieves' Hideout #3 |
Temple of Time #2 |
Hyrule Field - Gerudo Valley Entrance |
| 8C |
Inside the Deku Tree | Thieves' Hideout #4 |
Temple of Time #2 |
Hyrule Field - Gerudo Valley Entrance |
| 8D |
*FREEZE* | Thieves' Hideout #4 |
Temple of Time #2 |
Hyrule Field - Gerudo Valley Entrance |
| 8E |
*FREEZE* | Thieves' Hideout #4 |
Temple of Time #2 |
Hyrule Field - Gerudo Valley Entrance |
| 8F |
Inside Jabu-Jabu's Belly | Thieves' Hideout #4 |
Temple of Time #2 |
Kakariko Village - Death Mountain Entrance |
| 90 |
Inside the Deku Tree | Thieves' Hideout #5 |
Temple of Time #2 |
Kakariko Village - Death Mountain Entrance |
| 91 |
Inside the Deku Tree | Thieves' Hideout #5 |
Hyrule Field | Kakariko Village - Death Mountain Entrance |
| 92 |
Inside the Deku Tree | Thieves' Hideout #5 |
Hyrule Field | Kakariko Village - Graveyard Entrance |
| 93 |
Inside the Deku Tree | Thieves' Hideout #6 |
Hyrule Field | Kakariko Village - Graveyard Entrance |
| 94 |
Inside Jabu-Jabu's Belly | Thieves' Hideout #6 |
Hyrule Field | Kakariko Village - Graveyard Entrance |
| 95 |
Inside the Deku Tree | Thieves' Hideout #6 |
Hyrule Field | Kakariko Village - Graveyard Entrance |
| 96 |
*FREEZE* | Thieves' Hideout #6 |
Grotto 1 |
Zora's River - Waterfall [I] |
| 97 |
*FREEZE* | Thieves' Hideout #6 |
Grotto 1 |
Zora's River - Waterfall [I] |
| 98 |
Inside Jabu-Jabu's Belly [W] |
Thieves' Hideout #7 |
Grotto 1 |
Zora's River - Waterfall [I] |
| 99 |
Inside Jabu-Jabu's Belly [W] |
Thieves' Hideout #7 |
Grotto 1 |
Zora's River - Waterfall [I] |
| 9A |
Inside Jabu-Jabu's Belly [W] |
Thieves' Hideout #7 |
Grotto 2 |
Zora's River - Waterfall [I] |
| 9B |
Inside the Deku Tree | Thieves' Hideout #8 |
Grotto 2 |
Zora's River - Domain Entrance |
| 9C |
Inside the Deku Tree | Thieves' Hideout #8 |
Grotto 2 |
Zora's River - Domain Entrance |
| 9D |
Inside the Deku Tree | Thieves' Hideout #8 |
Grotto 3 |
Zora's River - Domain Entrance |
| 9E |
Inside Jabu-Jabu's Belly [W] |
Thieves' Hideout #8 |
Grotto 3 |
Zora's River - Domain Entrance |
| 9F |
Inside Jabu-Jabu's Belly [W] |
Thieves' Hideout #9 |
Grotto 3 |
Zora's Domain - Fountain Entrance |
| A0 |
Inside the Deku Tree | Thieves' Hideout #9 |
Grotto 3 |
Zora's Domain - Fountain Entrance |
| A1 |
Inside the Deku Tree | Thieves' Hideout #9 |
Grotto 4 |
Zora's Domain - Fountain Entrance |
| A2 |
Inside the Deku Tree | Thieves' Hideout #9 |
Grotto 4 |
Gerudo Valley #2 |
| A3 |
*FREEZE* | Thieves' Hideout #10 |
Grotto 4 |
Gerudo Valley #2 |
| A4 |
Inside the Deku Tree | Thieves' Hideout #10 |
Grotto 4 |
Gerudo Valley #2 |
| A5 |
Inside the Deku Tree | Thieves' Hideout #10 |
Grotto 5 |
Gerudo Valley #2 |
| A6 |
Inside the Deku Tree | Thieves' Hideout #10 |
Grotto 5 |
Gerudo Valley #2 |
| A7 |
*FREEZE* | Thieves' Hideout #11 |
Grotto 5 |
Lost Woods #2 |
| A8 |
*FREEZE* | Thieves' Hideout #11 |
Grotto 5 | Lost Woods #2 |
| A9 |
*FREEZE* | Thieves' Hideout #11 |
Grotto 6 |
Lost Woods #2 |
| AA |
Dodongo's Cavern | Thieves' Hideout #11 |
Grotto 6 |
Lost Woods #3 |
| AB |
Inside the Deku Tree | Thieves' Hideout #12 |
Grotto 6 |
Lost Woods #3 |
| AC |
*FREEZE* | Thieves' Hideout #12 |
Grotto 6 |
Lost Woods #3 |
| AD |
*FREEZE* | Thieves' Hideout #12 |
Grotto 7 |
Lost Woods #3 |
| AE |
Dodongo's Cavern | Thieves' Hideout #12 |
Grotto 7 |
Lost Woods #4 |
| AF |
Dodongo's Cavern | Thieves' Hideout #13 |
Grotto 7 |
Lost Woods #4 |
| B0 |
Inside the Deku Tree | Thieves' Hideout #13 |
Grotto 7 |
Lost Woods #4 |
| B1 |
Inside Jabu-Jabu's Belly #2 [F] |
Thieves' Hideout #13 |
Grotto 8 |
Lost Woods #4 |
| B2 |
Inside Jabu-Jabu's Belly #2 [F] |
Thieves' Hideout #13 |
Grotto 8 |
Ganon's Castle (Burning) #2 |
| B3 |
Dodongo's Cavern | Ganon's Castle (Burning) #3 | Grotto 8 |
Ganon's Castle (Burning) #2 |
| B4 |
Dodongo's Cavern | Ganon's Castle (Burning) #3 | Grotto 8 |
Ganon's Castle (Burning) #2 |
| B5 |
Inside the Deku Tree |
Ganon's Castle (Burning) #3 | Grotto 9 |
Ganon's Castle (Burning) #2 |
| B6 |
Inside Jabu-Jabu's Belly #2 [F] |
Ganon's Castle (Burning) #3 | Grotto 9 |
Ganon's Castle (Burning) #2 |
| B7 |
*FREEZE* | Top of Ganon's Tower | Grotto 9 |
Death Mountain Trail - Goron City Entrance |
| B8 |
Dodongo's Cavern | Top of Ganon's Tower | Grotto 9 |
Death Mountain Trail - Goron City Entrance |
| B9 |
Dodongo's Cavern | Top of Ganon's Tower | Grotto 10 |
Death Mountain Trail - Goron City Entrance |
| BA |
Inside the Deku Tree | Top of Ganon's Tower | Grotto 10 |
Death Mountain Trail - Goron City Entrance |
| BB |
Inside Jabu-Jabu's Belly [W] |
Top of Ganon's Tower | Grotto 10 |
Death Mountain Trail - Crater Entrance |
| BC |
Inside Jabu-Jabu's Belly [W] |
Great Fairy's Fountain 3 |
Grotto 10 |
Death Mountain Trail - Crater Entrance |
| BD |
Dodongo's Cavern | Great Fairy's Fountain 3 |
Grotto 11 |
Death Mountain Trail - Crater Entrance |
| BE |
Dodongo's Cavern | Great Fairy's Fountain 3 |
Grotto 11 |
Goron City - Crater Entrance |
| BF |
Inside the Deku Tree | Great Fairy's Fountain 4 |
Grotto 11 |
Goron City - Crater Entrance |
| C0 |
*FREEZE* | Great Fairy's Fountain 4 |
Grotto 11 |
Goron City - Crater Entrance |
| C1 |
*FREEZE* | Great Fairy's Fountain 4 |
Grotto 12 |
Goron City - Crater Entrance |
| C2 |
Inside the Deku Tree | Great Fairy's Fountain 4 |
Grotto 12 |
Lakeside Laboratory |
| C3 |
Inside the Deku Tree | Lost Woods #5 |
Grotto 12 |
Lakeside Laboratory |
| C4 |
Inside the Deku Tree | Lost Woods #5 |
Grotto 12 |
Lakeside Laboratory |
| C5 |
Inside the Deku Tree | Lost Woods #5 |
Impa's House - Cow Pen |
Lakeside Laboratory |
| C6 |
*FREEZE* | Lost Woods #5 |
Impa's House - Cow Pen |
Top of Ganon's Castle |
| C7 |
Inside the Deku Tree | Lon Lon Ranch #3 |
Impa's House - Cow Pen |
Top of Ganon's Castle |
| C8 |
Inside the Deku Tree | Lon Lon Ranch #3 |
Impa's House - Cow Pen |
Top of Ganon's Castle |
| C9 |
Inside the Deku Tree | Lon Lon Ranch #3 |
Bottom of the Well |
Top of Ganon's Castle |
| CA |
*FREEZE* | Lon Lon Ranch #3 |
Bottom of the Well | Hyrule Market |
| CB |
*FREEZE* | Lon Lon Ranch #4 |
Bottom of the Well | Hyrule Market |
| CC |
Inside the Deku Tree | Lon Lon Ranch #4 |
Bottom of the Well | Market Ruins |
| CD |
Inside the Deku Tree | Lon Lon Ranch #4 |
Lon Lon Ranch - Shed |
Market Ruins |
| CE |
Inside the Deku Tree | Lon Lon Ranch #4 |
Lon Lon Ranch - Shed |
Hyrule Market #2 |
| CF |
Inside the Deku Tree | Lost Woods #6 |
Lon Lon Ranch - Shed |
Hyrule Market #2 |
| D0 |
Inside Jabu-Jabu's Belly | Lost Woods #6 |
Lon Lon Ranch - Outside Shed |
Hyrule Market #2 |
| D1 |
Inside Jabu-Jabu's Belly | Lost Woods #6 |
Lon Lon Ranch - Outside Shed |
Market Ruins |
| D2 |
Inside the Deku Tree | Lost Woods #6 |
Lon Lon Ranch - Outside Shed |
Market Ruins |
| D3 |
Inside the Deku Tree | Lost Woods - Goron Entrance |
Lon Lon Ranch - Outside Shed |
Hyrule Market #3 |
| D4 |
Inside the Deku Tree | Lost Woods - Goron Entrance |
Lon Lon Ranch - Outside Shed |
Market Ruins |
| D5 |
*FREEZE* | Lost Woods - Goron Entrance |
Ice Cavern |
Market Ruins |
| D6 |
Inside the Deku Tree | Lost Woods - Goron Entrance |
Ice Cavern | Zora's River [I] |
| D7 |
Inside the Deku Tree | Lost Woods - River Entrance |
Ice Cavern | Zora's River [I] |
| D8 |
Inside the Deku Tree | Lost Woods - River Entrance |
Ice Cavern | Zora's River [I] |
| D9 |
*FREEZE* | Lost Woods - River Entrance |
Kakariko Village - Outside Cow Pen |
Zora's River [I] |
| DA |
*FREEZE* | Lost Woods - River Entrance |
Kakariko Village - Outside Cow Pen |
Zora's River [I] |
| DB |
*FREEZE* | Lost Woods - Hyrule Entrance |
Kakariko Village - Outside Cow Pen |
Zora's River - Woods Entrance [I] |
| DC |
Inside the Deku Tree | Lost Woods - Hyrule Entrance |
Kakariko Village - Outside Cow Pen |
Zora's River - Woods Entrance [I] |
| DD |
Inside the Deku Tree | Lost Woods - Hyrule Entrance |
Lost Woods - Forest Entrance |
Zora's River - Woods Entrance [I] |
| DE |
Inside Jabu-Jabu's Belly #2 [F] |
Lost Woods - Hyrule Entrance |
Lost Woods - Forest Entrance |
Zora's River - Woods Entrance [I] |
| DF |
Inside Jabu-Jabu's Belly #2 [F] |
Lost Woods - Hyrule Entrance |
Lost Woods - Forest Entrance |
Desert Colossus #3 |
| E0 |
Inside the Deku Tree | Goron City - Lost Woods Entrance |
Lost Woods - Forest Entrance |
Desert Colossus #3 |
| E1 |
Inside the Deku Tree | Goron City - Lost Woods Entrance |
Lon Lon Ranch - Talon's House |
Desert Colossus #3 |
| E2 |
Inside the Deku Tree | Goron City - Lost Woods Entrance |
Lon Lon Ranch - Talon's House |
Desert Colossus #3 |
| E3 |
Inside the Deku Tree | Lake Hylia #3 |
Lon Lon Ranch - Talon's House |
Desert Colossus #3 |
| E4 |
*FREEZE* | Lake Hylia #3 |
Lon Lon Ranch - Talon's House |
Spirit Temple #2 |
| E5 |
*FREEZE* | Lake Hylia #3 |
Deku Tree Grove |
Spirit Temple #2 |
| E6 |
Inside the Deku Tree | Lake Hylia #3 |
Deku Tree Grove | Spirit Temple #2 |
| E7 |
Inside the Deku Tree | Lake Hylia #3 |
Deku Tree Grove | Spirit Temple #3 |
| E8 |
Forest Temple |
*FREEZE* | Deku Tree Grove | Spirit Temple #3 |
| E9 |
Forest Temple | *FREEZE* | Spirit Temple - Boss |
Spirit Temple #3 |
| EA |
Inside the Deku Tree | *FREEZE* | Spirit Temple - Boss |
Spirit Temple #3 |
| EB |
Inside the Deku Tree | Kakariko Village #4 |
Spirit Temple - Boss |
Desert Colossus #4 |
| EC |
Inside the Deku Tree | Kakariko Village #4 |
Spirit Temple - Boss |
Desert Colossus #4 |
| ED |
*FREEZE* | Kakariko Village #4 |
Spirit Temple - Boss |
Desert Colossus #4 |
| EE |
*FREEZE* | Kakariko Village #4 |
Castle Courtyard - In Front of Zelda |
Desert Colossus |
| EF |
*FREEZE* | Great Fairy's Fountain 5 |
Castle Courtyard - In Front of Zelda |
Desert Colossus |
| F0 |
*FREEZE* | Great Fairy's Fountain 5 |
Castle Courtyard - In Front of Zelda |
Desert Colossus |
| F1 |
Inside the Deku Tree | Great Fairy's Fountain 5 |
Temple of Time | Desert Colossus |
| F2 |
Inside the Deku Tree | Great Fairy's Fountain 5 |
Temple of Time | Desert Colossus |
| F3 |
Inside Jabu-Jabu's Belly [W] |
Death Mountain Crater | Temple of Time | Spirit Temple #4 |
| F4 |
Inside Jabu-Jabu's Belly [W] |
Death Mountain Crater | Temple of Time | Spirit Temple #4 |
| F5 |
Dodongo's Cavern | Death Mountain Crater | Gerudo Fortress - Jail |
Spirit Temple #4 |
| F6 |
Dodongo's Cavern | Hyrule Castle #2 |
Gerudo Fortress - Jail |
Spirit Temple #4 |
| F7 |
Inside the Deku Tree | Hyrule Castle #2 |
Gerudo Fortress - Jail |
Hyrule Field - Ranch Entrance |
| F8 |
*FREEZE* | Hyrule Castle #2 |
Gerudo Fortress - Jail |
Hyrule Field - Ranch Entrance |
| F9 |
*FREEZE* | Hyrule Castle #2 |
Grotto 13 |
Hyrule Field - Ranch Entrance |
| FA |
*FREEZE* | Ganon's Castle | Grotto 13 |
Hyrule Field |
| FB |
Inside the Deku Tree | Hyrule Castle #2 |
Grotto 13 |
Hyrule Field |
| FC |
Inside Jabu-Jabu's Belly [W] |
Kakariko Village #5 |
Grotto 13 |
Hyrule Field |
| FD |
Inside Jabu-Jabu's Belly [W] |
Kakariko Village #5 |
Sacred Forest Meadow | Hyrule Field |
| FE |
*FREEZE* | Kakariko Village #5 |
Sacred Forest Meadow | Kakariko Village #6 |
| FF |
*FREEZE* | Kakariko Village #5 |
Sacred Forest Meadow | Kakariko Village #6 |
Age Modifier: This code lets you change
whether Link is an adult or child, regardless of game progress or save
file. It'll even work on the title screen! There are only
two possible values with the age modifier: 00 - Adult, and 01 -
Child. Unlike Majora's Mask, you cannot take on the forms of others using this code. However, be very careful
with this code! Aside from the fact that it is messing with the
game's sequence when you change Link's age, it also can cause the game
to crash (if you're playing on the N64) or severely glitch (if you're
using an emulator, particularly Jabo's plugins) if you change his age
while Link is still displayed! Use this code only at the beginning of the game.
PJ64 Users: Project64's revised cheat files
automatically assign Link's Age Modifier to the button R and instruct
you to use it when the screen turns black. This is a very
dangerous manuever in that your timing must be very, very good.
If it isn't, then you'll be bombarded with error messages until the new
area is loaded. To resolve this, you can either download a
different plugin (we recommend Rice's plugins), or you can edit the
code and remove the first line of the code. This will remove the
activator and simply trigger it as soon as the game's loaded. Be
warned, however, that the code will still affect savestates when you
load them, so exercise caution with this code at all times.
Unless you have a different plugin, in which case, go nuts.
This is just so that the code info above
will appear on its own at the top, to avoid confusion. Sorry, nothing
here!